Sean is back once again to advance your plumbing knowledge; this time about plumbing bulkheads. If you haven’t seen them already, go ahead and check out the other plumbing posts introducing you to joining pipes and how to use valves.
In this video and article, Sean will discuss what bulkhead fittings are, their parts, and their functions. He will also walk you through how to get them in your system, and then show you a couple of examples of how we’ve implemented them in our farm.
What is a bulkhead fitting?
A bulkhead is a fitting designed to allow the drainage of a tank or reservoir through a hole. It creates a seal to avoid leakage and allows you to plumb the water from that tank to wherever you need it to go.
For example:
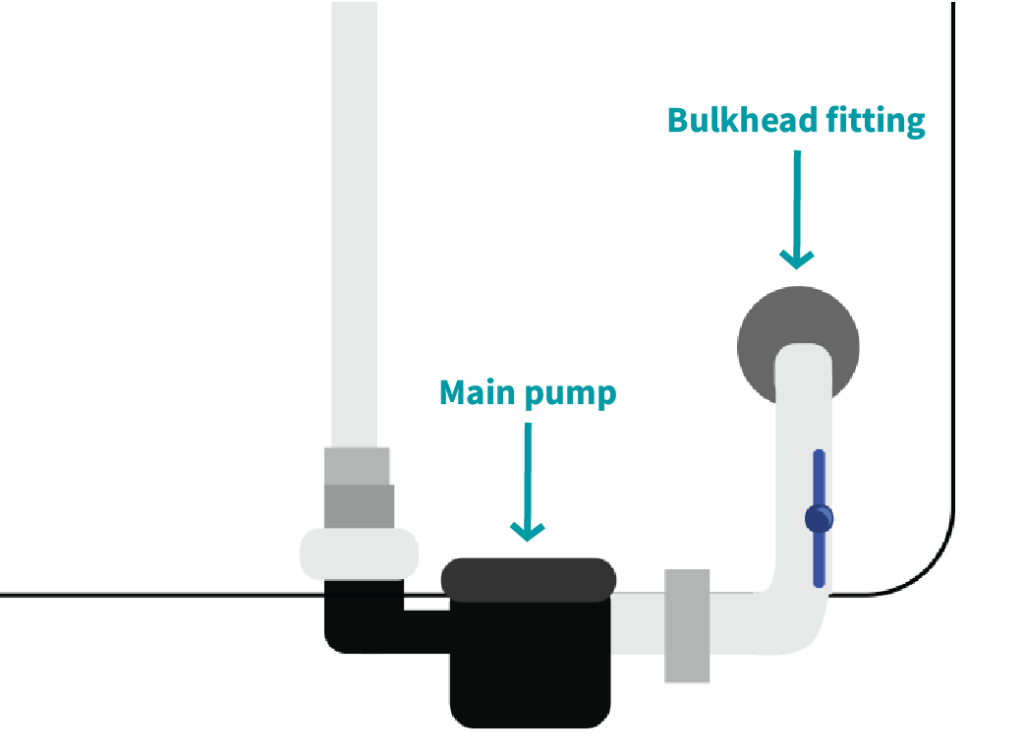
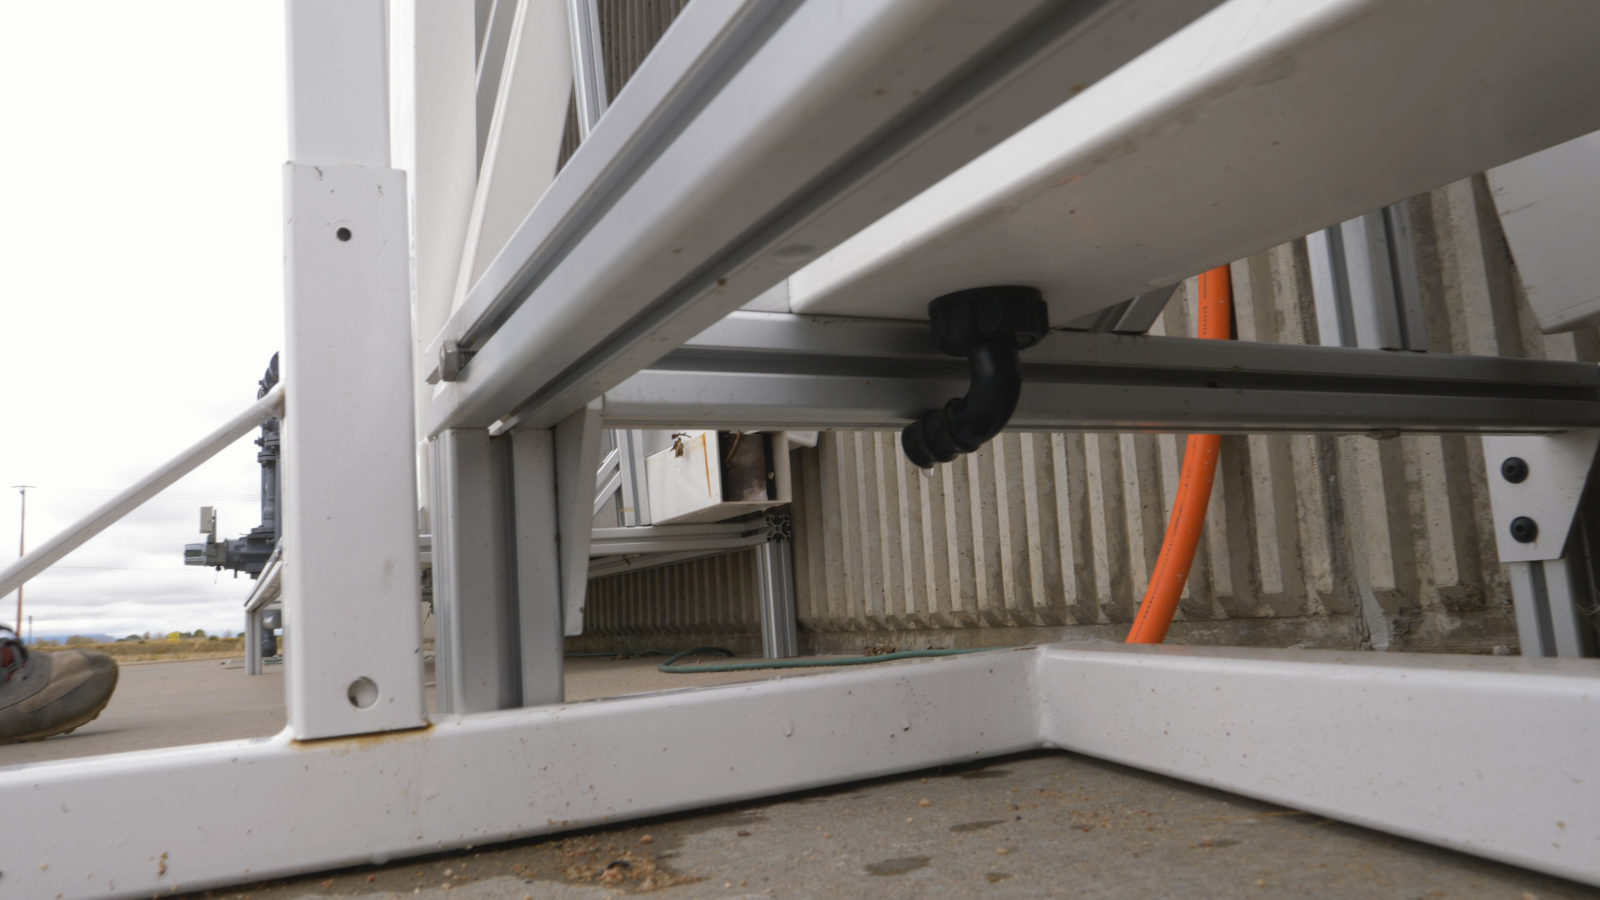
In our system, we use a bulkhead in our main reservoir, which is followed by piping and the water flows into the pump. This allows us to pull water from the bottom of the tank, as opposed to pulling from the very top.
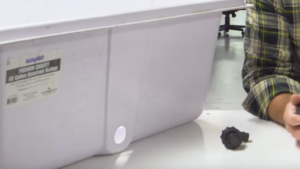
We also use a different type of bulkhead in the bottom of our ZipRack gutters which allow water to accumulate and then flow through to a designated point (a sump, for example).
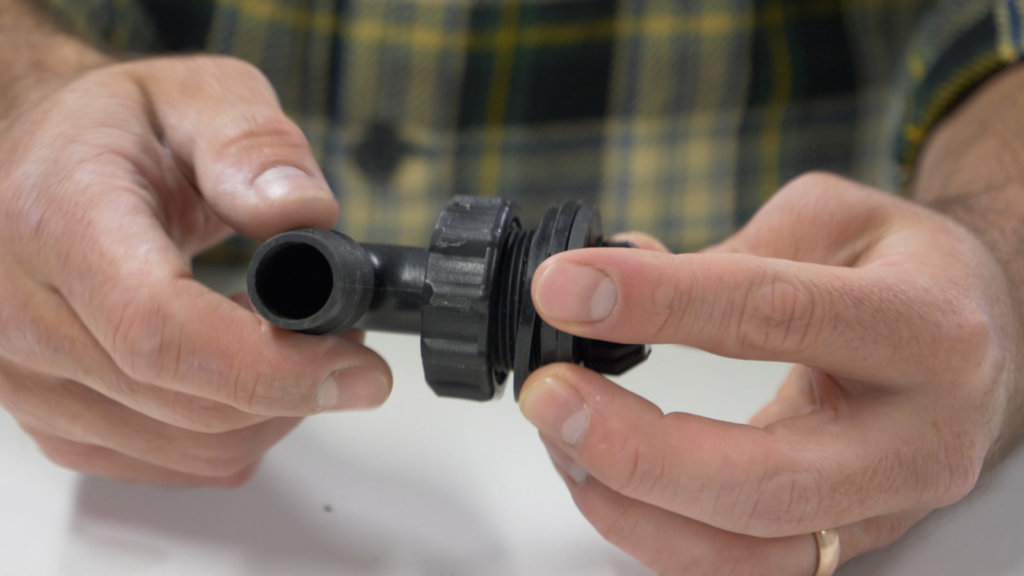
The parts of the bulkhead fitting
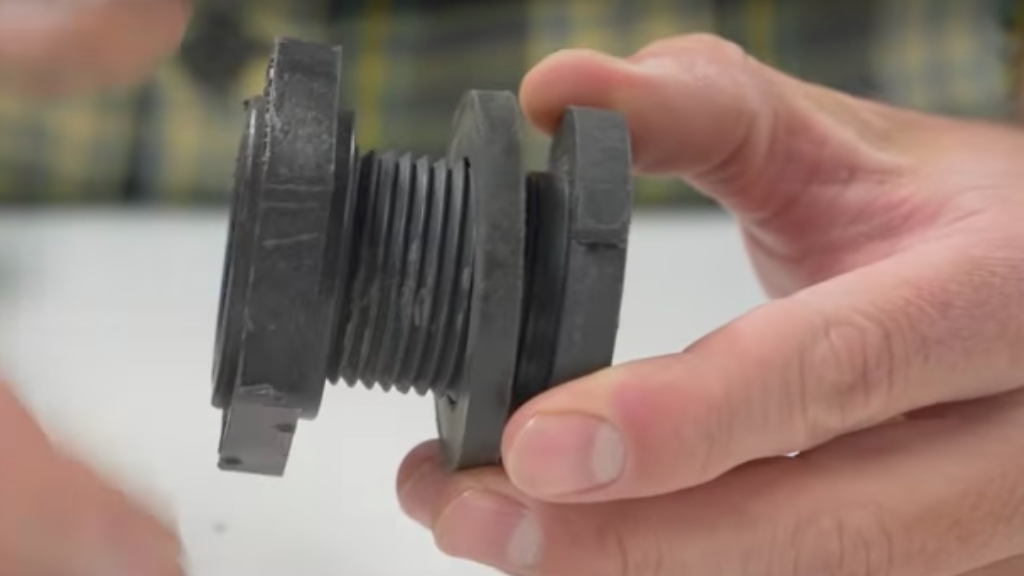
On most bulkhead fittings, there are three main parts. The first is the body of the bulkhead, which has both interior and exterior threads on it. The second part is a gasket (sometimes there are two). The last part is a nut which seats up against the gasket, presses against the tank and creates the watertight seal.
Another example has a barbed, bent end on it. These are the type that we use in our ZipRack gutters. They have similar components: the body, the nut, and this time two gaskets. One gasket will go on either side of the gutter. This bulkhead fitting has an extra piece though. It is a small screen that fits into the interior threads of the fitting. This just helps us, in the ZipRack case, to keep debris from clogging up the fitting and the line downstream.
Now that we’ve discussed the key components of bulkhead fittings, we’ll move forward with how to install them, and some of the important things to think about during that process.
Installing bulkheads
Sean has a reservoir that he’ll use as an example, so we’ll follow along and walk you through the process.
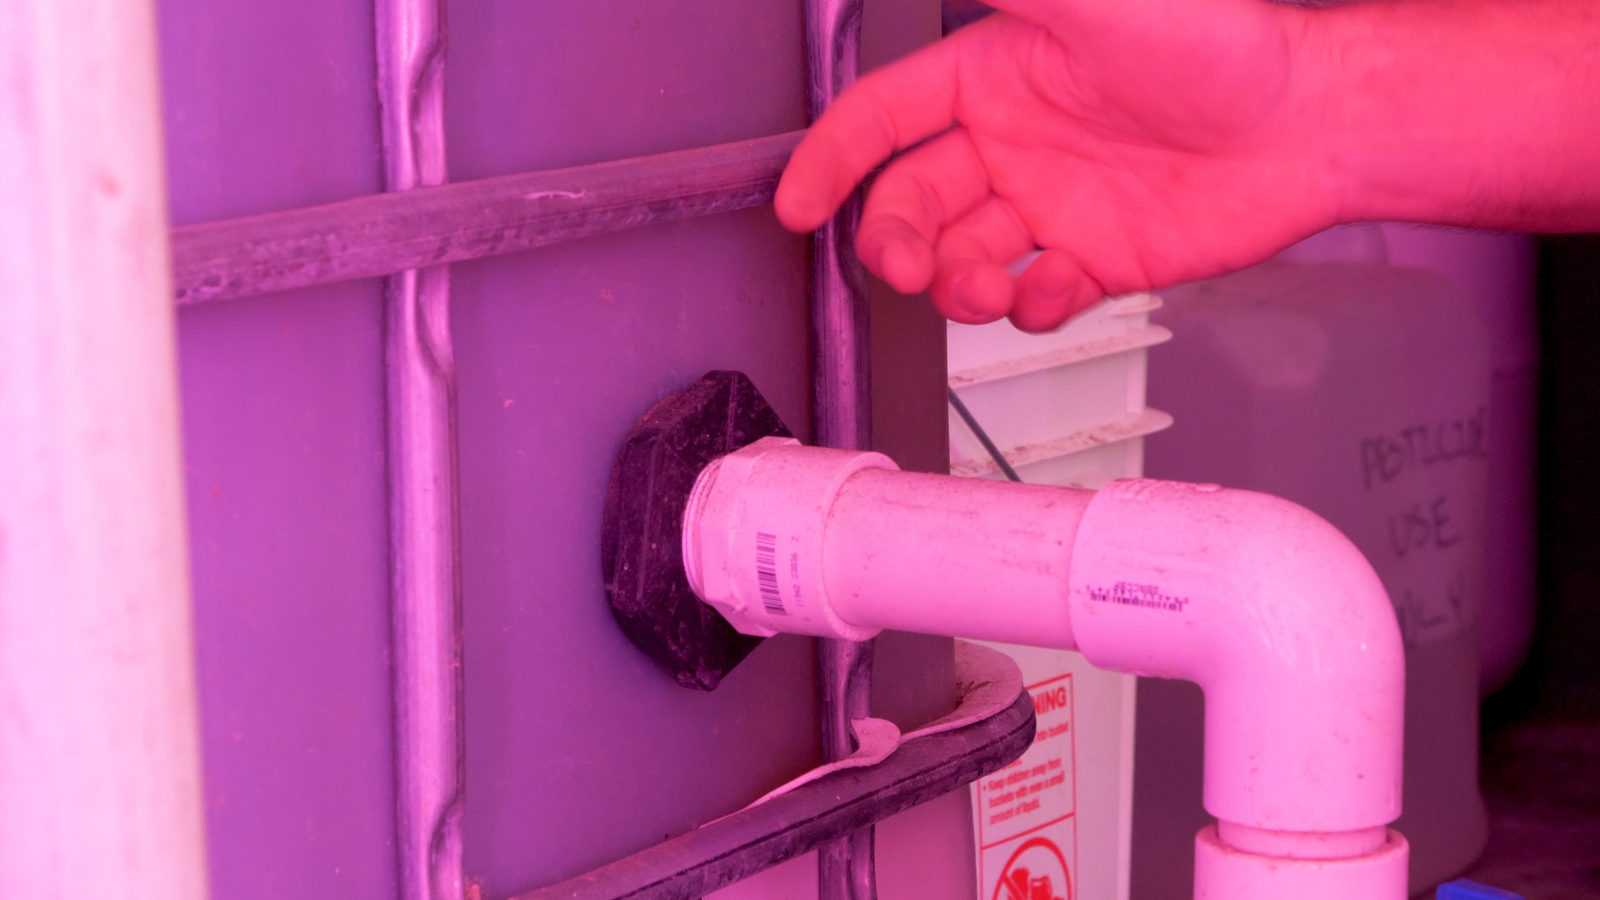
This particular reservoir has a hole in the bottom of one of the walls into which the bulkhead will be fit. This is so that water can be easily drained and contained as it leaves the reservoir. After the bulkhead is fit to the reservoir, we’ll be able to add some tubing for further plumbing.
Step 1: Cut the hole
The first thing you’re going to need to do with a bulkhead fitting is to measure the diameter of the exterior threads. This will indicate the size of the hole saw you need in order to drill the hole in the reservoir.
Step 2: Fit the bulkhead into the hole
You want the hole to fit snugly around the threads of the bulkhead, but not so snugly that you can’t insert the fitting. If you watch the video (around 4:15), you’ll see that when Sean puts the fitting into the hole it slides in fairly easily, but you can hear the threads passing the wall of the reservoir. It should, again, be fairly snug, so it shouldn’t be drooping out of the hole. If it is, it’s likely you’ve cut the hole too large and might need a bigger fitting. Insert from the outside, so that the head of the bulkhead is on the outside of the reservoir, and the threads are on the inside.
Step 3: Fit the gasket and nut
The next step is to put the gasket onto the fitting from the inside of the reservoir. Slide it up right against the wall of the reservoir, and follow it with the nut. You’ll notice that a lot of bulkhead nuts are reverse-thread. Don’t let it frustrate you too much, it just means that it’s “lefty-tighty.”
Thread it all the way up against the gasket, and get it nice and tight. You’ll need those parts to make a seal if you want your bulkhead to be successful.
From there, we can thread any type of fitting into the internal threads of that bulkhead, and plumb out of the reservoir.
You know what a bulkhead is, you know how to install it, but where would you use one of these? Read on, my friends!
Examples
You’ll see in our farm that the bulkhead is fit into a hole that was drilled into the main reservoir. There is no leakage, which means that the nut on the back is nice and tight. It was then just a matter of threading in a PVC fitting and piping it down to our pump.
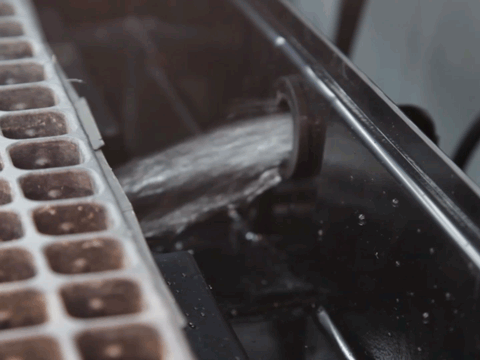
The next example is one from the ZipRacks, where water is accumulated at the bottom of the gutter and allowed to drain out to a sump. This is an appropriate application for the barbed bulkhead fittings. It fits in the bottom of the gutter and drains the water to be piped to a separate sump tank.
Get draining!
Get out there and fit some bulkheads! We hope that this article has helped you prepare for your hydroponic plumbing tasks, and has helped get you closer to having your system up and running! If not, shoot us your questions and comments, and definitely any examples you want to share!
We’ll see you next time for installing drip emitters.