

If you’re building a farm, you’ll need to understand plumbing. Plumbing can seem hard to beginners, but so long as you can follow instructions and have the proper tools, anyone can learn basics such as how to join pipes.
Our goal is to teach you how to get your systems all plumbed up and pumping nutrients to your plants! To that effect, we are kicking off a “Basics of Plumbing” series, led by our own expert, Sean Schaub. Sean has installed dozens of systems and knows his hydroponic plumbing well!
Plumbing basics: joining PVC
We’ll start with the basics of joining PVC and fittings and the proper technique to get a good, lasting, leak-free joint!
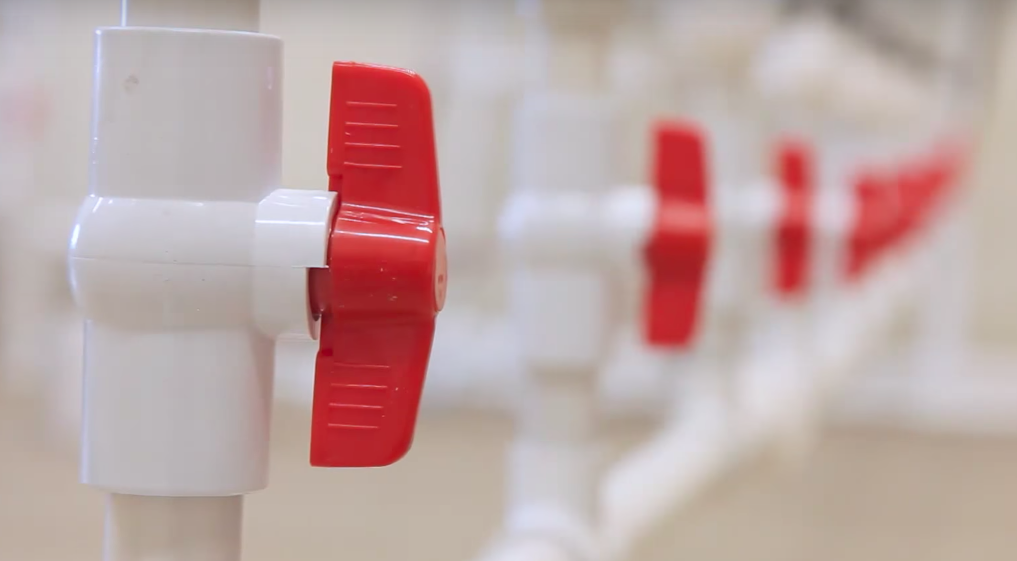
Joints need to be made when you are moving water from point A to point B. Straight joints are used to extend the length of a stretch of pipe, and elbows or tees are used when you need to change directions or split flow into separate lines (as is the case with a tee let’s say).
In this video, we’ll be showing you two methods for creating joints. Sean is set up with a length of PVC pipe and two types of fittings. The first is a socket fitting, which is straight and has one tapered end and one threaded end. The second fitting is an elbow with threads. In order to join them, you’ll need the following materials:
Remember! PVC primer and the cement have some pretty strong fumes, so make sure that you are working in a well-ventilated space with a fan or respirator. ALWAYS follow safety instructions that come with the materials.
Alright, let’s get started! There are two methods for linking pipe to create a joint—by cementing and by threading. We’ll start with cementing, for which you’ll need the primer, PVC cement, and a socket fitting. The thing about cementing is that it is a permanent joining—you cannot remove it once it’s cemented.
Method #1: Cementing
Step one: Cut your PVC.
The first thing you’ll probably do is cut your PVC pipe to length using your cutting tool. This, of course, will be done after taking measurements—measure twice, cut once!
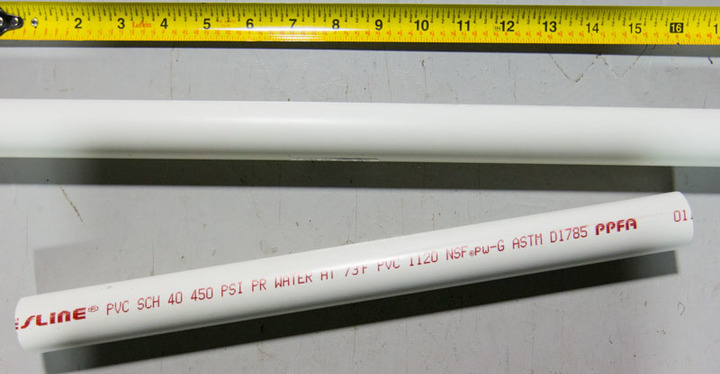
Sean has found that the ratcheting cutting tool is the easiest to use. However, it only sizes up to about 2-inch pipe. If you have larger pipe, make sure that you’re using the appropriately sized cutting tool.
The most important thing about cutting your pipe, other than safety, is getting a square cut. That means that the end of your pipe is nicely squared off, and not uneven or jagged. This is the most common cause of bad joints and leaks because the PVC won’t seal properly.
Socket fittings are designed with a bit of a taper on the inside, which is where the sealing actually happens. Before adding any primer or cement, slide the pipe into the fitting. If it goes in about half way and stops, you’ve got the right fit.
If the pipe slides easily through the fitting and does not stop, you’ll need to get new pipe or a new fitting.
Step two: Taper the cut edge.
Now that you’ve got your pipe cut to the right size, the next step is to remove the sharp edge around your cut. Use the chamfer tool by placing it on the end of the cut, and twisting.
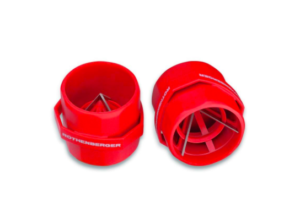
If the edge is left sharp when you insert that end of the pipe into the fitting, it will scrape all of the glue to the back. By chamfering the edge, the glue is allowed beyond the edge of the cut, and along the sides of the pipe for a tighter seal within the fitting, which will provide a stronger joint.
Make sure that the end of the pipe is not covered in any dust or particles; wipe it off with one of those rags. Do the same for the fitting so that both are nice and clean.
Step three: Prime the PVC.
Once your pipe is cut, chamfered, and cleaned, it’s time to prime it for the cement. The primer plays a special and crucial role in making joints. The idea is to get the strongest joint possible, and the way to do that is to create what is essentially a weld between the pipe and the fitting. The primer, when applied to the outer surface of the pipe and the inner surface of the fitting, will actually soften the PVC. Then, once the cement is applied, the pipe and the fitting will actually join together where it’s been softened.
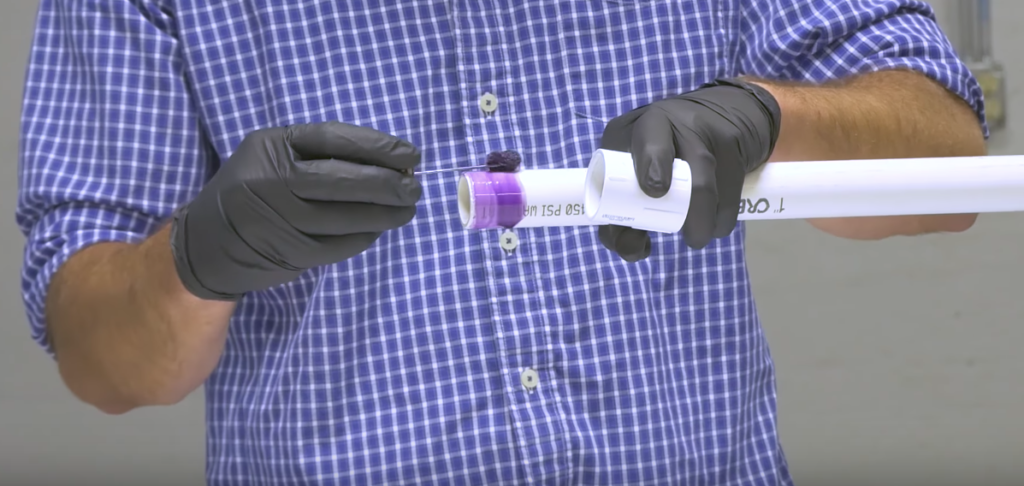
Primer comes in two colors: clear and purple. While the clear works just fine, purple is often preferred because it indicates visually that the pipe has indeed been primed. It is also common because a lot of inspectors will require it in order for you to meet code.
Use the applicator that comes in the primer to apply an even layer around the exterior surface of the pipe at the depth to which the fitting will reach. Do the same around the inside of the fitting. It may be helpful, if you can, to hold both pieces in one hand while you coat the primer with the other. Work the primer in well so the plastic of the PVC gets nice and soft.
Step four: Apply cement and insert pipe to fitting.
Once primed, the pipe is immediately ready for the cement to be applied right on top of that wet primer. Use an ample amount; the most common mistake that leads to leaks is simply not using enough. Just like the primer, apply an even, generous coat. Cover the area that has been primed, and repeat with the fitting. Apply a second layer to each, though you’ll want to work fairly quickly because the cement sets quickly.
Insert the pipe into the fitting using a twisting action, and then hold it together, pressing a little bit, for about thirty seconds. It’s important to hold it while it sets because the fitting is tapered and may cause the pipe to slide back out.
Once done, inspect the area where the fitting and the pipe meet. You’ll know you’ve used sufficient cement if you see a little bit of a bead running along the edge of the fitting. Remove the excess with a rag to clean it up.
If you’re gluing a tee or an elbow, remember that they are direction-dependent and you’ll need to orient it correctly and quickly so it sets the right way.
Method #2: Threading
Now that you’re familiar with the process of creating a joint by cementing, we’ll talk about the next common method: threading them together. Threading is a less permanent method as the fittings can be unthreaded if necessary.
There are a couple of things that you can use to help lubricate the threads, which will result in a leak-free joint. One is a teflon tape, the other is a teflon paste. For the most part, these can be used interchangeably, but the tape is a little bit easier to use.
The main thing to consider when using teflon tape is the direction in which you wrap it. If you’ve done it correctly, when you thread the joint onto the fitting it should actually smooth the tape down. If you’ve done it backward, the thread will catch the end of the tape and unravel it, undoing everything you’ve just done. Other than that, it doesn’t really matter how you go about wrapping the tape.
The easiest way, however, is to hold the fitting in one hand and the tape in the other. Pull the tape out from the roll a bit, so you have some starting room, and put your finger through the hole, as shown by Sean. Apply the tape to the joint, covering the depth of the threads with several good layers.
Then, thread the pipe into the fitting, and you should notice that the tape provides a little bit of lubrication and sealing. If that is not the case, double check that the tape is wrapped in the right direction, and there are sufficient layers. This will allow the joint to be threaded tightly to the fitting. Do what you need to get it as tight as you can (use a wrench), but be careful of tightening too much; the fitting may crack or break.
Teflon paste usually comes in a little bottle resemblant of the Elmer’s rubber cement you may have used in elementary school or a college art class. Attached to the underside of the lid is that same convenient brush that you can use to apply the paste to the inside of the threads on the fitting. It’s nice here to try to get a smooth, even layer all the way to the depth of the threads. Sometimes it’s worth brushing some on the male threads on the fitting as well. Then just snug that puppy down, taking care not to get it so snug that it cracks the plastic.
Give it a try!
That wraps up this first section on plumbing, and hopefully, you feel confident about joining these types of fittings. This is the first video and blog in this plumbing series, so if you have questions or suggestions. Additional videos will include flexible tubing, barbed fittings, hose clamps, bulk head fittings, etc. We’ll discuss what those are, how they’re used, and how to properly join them. But for now, share your thoughts!

PVC is NOT SAFE for hydroponics, uPVC is.
Acidic nutrient solutions leach plasticisers from PVC, you should always use the unplasticised raw MATERIAL (uPVC), not the worked one(PVC).
Read Molyneux, A guide to NFT.