
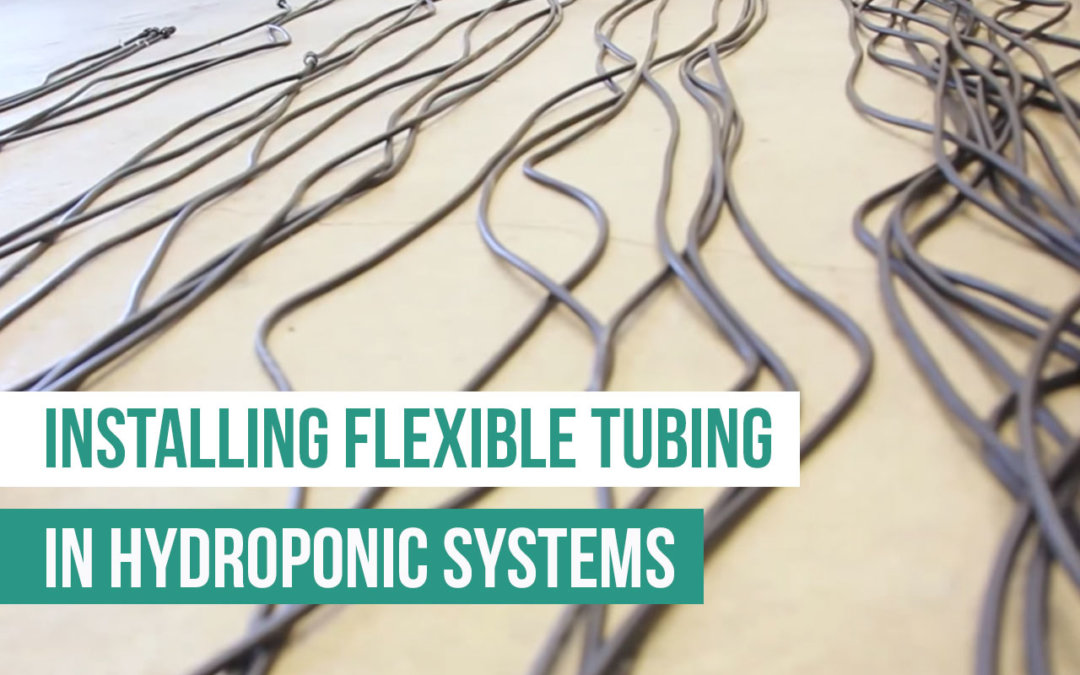
Hello everybody! We are back with the plumbing series led by Sean, this time for plumbing flexible tubing. Previously, we’ve shown you how to join pipes that are made from PVC. This time we’ll show you a solution for when you need something a little bit more adjustable to get your hydroponic solution where you need it to go.
Today, Sean will talk about two specific types of flexible tubing: poly and vinyl. There are a ton of different types of tubing. But for growing systems, we typically use a vinyl or poly tubing. These are very common and are used for a variety of things including field irrigation. You’ll use them anywhere you need some flexibility.
In a lot of applications, these types of flexible tubing can be used interchangeably. In general, the vinyl costs a little bit more but is quite durable. We mainly use the poly tubing when we need to install drip emitters. In our systems, we use the vinyl tubing for most of our feedlines and with quick-connect fittings to connect to other pieces. The durability of the vinyl is important in those instances.
Both types come in potable versions. In addition, low water pressure means that we don’t have too much concern with the difference in pressure capability between the two.
Fittings & Clamps
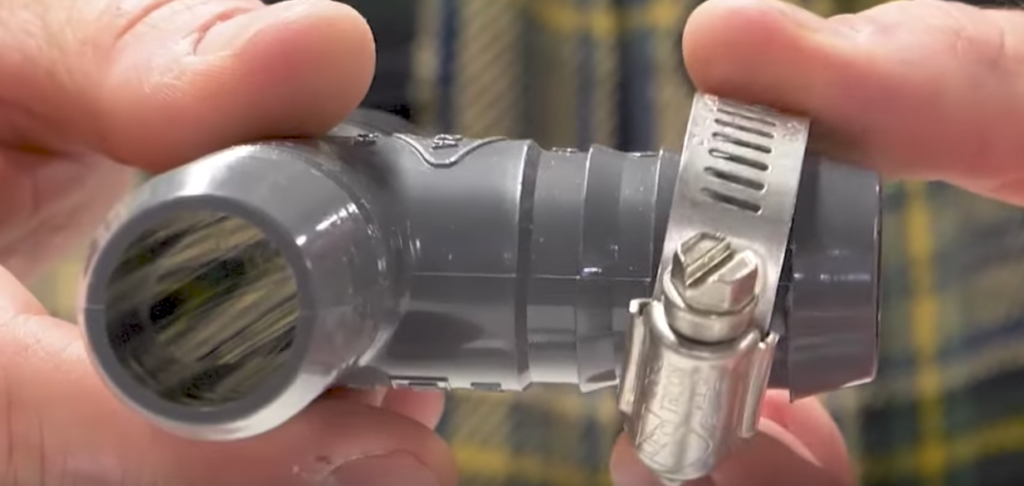
The types of fittings you’ll use while plumbing flexible tubing will most commonly be barbed fittings. Valves, tees, elbows, and straight connection fittings all come with the option of having those barbs. Below is an example of a 1-inch barbed T fitting. When inserted into the tube, the ridges pull back on the material of the tube and keep it from slipping off. For this reason, it will be important to make sure that the fittings match the size of tube you have.
It should be snug, but not SUPER snug (otherwise it’ll be hard to get the fitting in).
Once the hose and the fitting are connected, secure the two by using a hose clamp. You won’t need any cement or glue like you would with PVC pipes. The type of hose clamp to look for has many names: worm-drive, screw, or even band clamps. They are usually stainless steel and are fairly costly. So, in low-flow applications, if your tubing fits tightly, you may not even need one. However, if there is any pressure (close to your pump for example) it’s a good idea to go ahead and use a clamp.
There are other types of clamps, but these are the most available and they cover a wide size range.
Remember while your project is coming together that flexible tubing comes in an array of sizes and you’ll likely use several of them. The “spaghetti” or ¼-inch tubes are usually used on the ends of drip emitters. Up from there, you’ll see ½-, ¾-, and 1-inch sizes. They go larger but for most applications as hydroponic growers, the ½- and ¾-inch tubes are sufficient. Keep that in mind and source the fittings accordingly.
Sometimes the way that the tubing is measured can be a little bit funky between the poly and the vinyl tubing. For example, you might source a fitting that fits ¾-inch poly tubing perfectly but is slightly looser or tighter in the ¾-inch vinyl. Sometimes this is due to the thickness of the tubing wall so keep an eye out for that and make sure that things fit nicely. Make adjustments if you need to.
We’ve got you set up with the right tubing and the right fittings. Now we’ll talk about some of the tools you need to get everything put together.

Tools to use with flexible tubing
Next, we’ll cover the tools that you’ll use with flexible tubing. There aren’t a lot.
The main tool is a flexible tubing cutter. It looks like a half-clamp, half-blade tool, and it works best if you rotate it while making the cut to get a nice, smooth surface. You won’t need much effort; they’re very handy and inexpensive.
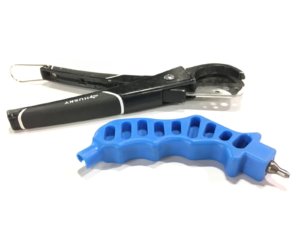 The other tool to use with the poly tubing is the punch tool, which we mentioned in the drip emitters post. Make sure the punch tool is sized appropriately for the drip emitter that you’re using.
We mentioned earlier that you won’t need any cement or glue when connecting flexible tubing to fittings. But, the one thing you might need to do is lubricate the inside of the tubing or the outside of the fitting so they’ll slide together a bit more easily. You don’t need to get anything special; Sean has used a little bit of dish soap, which works well.
Once you’ve got everything you need to piece together flexible tubing in your system, you should know where to put it. Sean is going to take you back to our farm to show you some appropriate applications!
Examples in the farm
We are back in our farm, in order to show you some of the places we have used vinyl and poly tubing. The first place is from our IBC tank and the main plumbing system. 1-inch vinyl tubing carries the hydroponic solution from the manifold to the main feedline for the ZipRacks. This is also a great example of where you would want to use a hose clamp: the tubing comes directly from the pump and carries all of the water that will be distributed throughout the system. The pressure at the joint makes applying the hose clamp a good call.
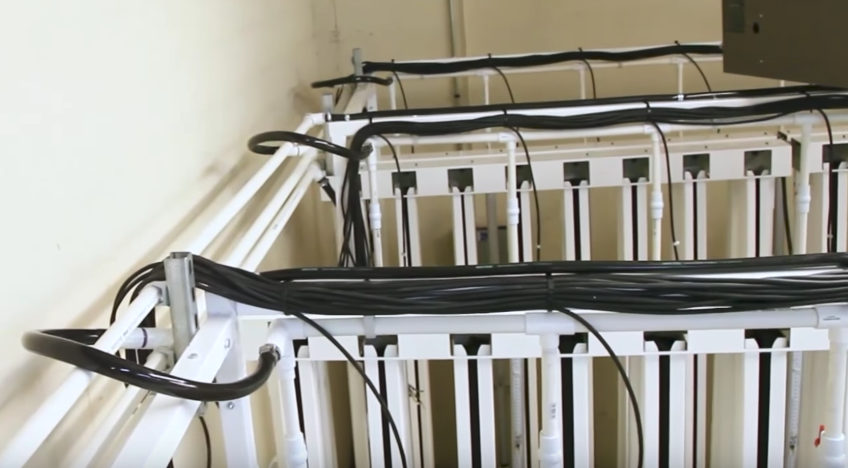
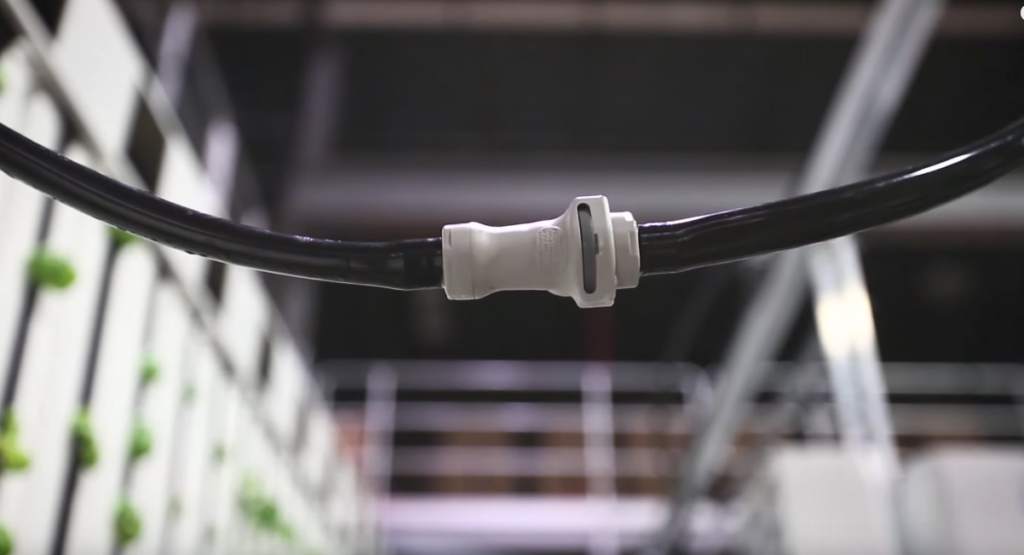
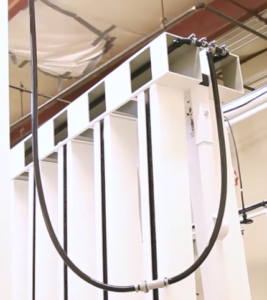
At the top of that tube there are additional connections to ¾-inch vinyl tubing that run the whole length of the rack. Those then branch off with tee fittings to ½-inch lines, also vinyl, that connect to the individual racks. These are connected to those racks with quick-connect fittings so that the racks can be isolated from the water flow if needed (see photo below).
 These are nice applications of vinyl because while it is flexible, it does not kink easily, and it is pretty durable. Flexibility and durability are important characteristics because these tubes tend to get moved around quite a bit.
At the ends of those vinyl tubes are barbed fittings that connect to the poly tubing that runs along the top of the racks. These are the ones in which drip emitters are installed. Remember that the poly tubing and the drip emitters should be sized based on the appropriate flow-rate for your system.
Give it a shot!
That’s it for flexible tubing and with it, we wrap up the plumbing series! If you missed any of the previous plumbing posts, make sure you get those under your belt so you can set up your system correctly! Leave us a comment or an email if you have any questions, and send photos of your examples if you would like to share; we’d love to see them!

Great article about flexible tubing! I found it very interesting and Damn informative. To be more effective at plumbing I suggest everyone to use quality material only. Though, I trust “The Spiratex” for all my custom plastic tubing needs. Cheers!!