
In this post:
- Intro to Dutch Buckets
- Variations on Design
- Video – How to Build a Hydroponic Dutch Bucket System
- Parts Needed
- Steps to Building
- Your Own Hydroponic Dutch Bucket System
Dutch buckets as “fragmented media beds”
Hydroponic Dutch bucket systems (Bato bucket systems) are perhaps the simplest hydroponic (and sometimes aquaponic, although aquaponics is more difficult) system to build, and a favorite of growers the world over.
 A variation of media bed techniques, Dutch buckets break the media bed system down into smaller components (the buckets). This approach offers several benefits.
Each bucket can be set up separately, allowing growers to space out larger crops (like tomatoes or eggplants) without wasting media.
Separate buckets can be useful in pest management as well since an infected bucket can be removed from the system without having to sacrifice an entire bed.
In this post, you’ll learn how to build your own Bato bucket hydroponic system.
Dutch buckets for nutrient hogs and large crops
For indoor farmers, a hydroponic Dutch bucket system gives growers a way to grow large “nutrient-hog” crops separately. Fruiting crops and large-statured crops tend to use more (and a different ratio of) nutrients than greens. This means that when both greens and fruiting crops are run on the same system, either the EC is too high for the greens, or too low for the fruiting crops. As you can imagine, this hurts production levels.
Tomatoes have traditionally been the most popular crop for Dutch buckets, and in fact, most commercial hydroponic tomatoes are produced this way. Dutch buckets allow tomato farmers to grow large vining varieties and train them up from the bucket. This can be a fairly efficient use of space since the tomatoes are using a large portion of the lower growing space.
>>>Read More: The Best Plants for Bato Buckets
Variations on design
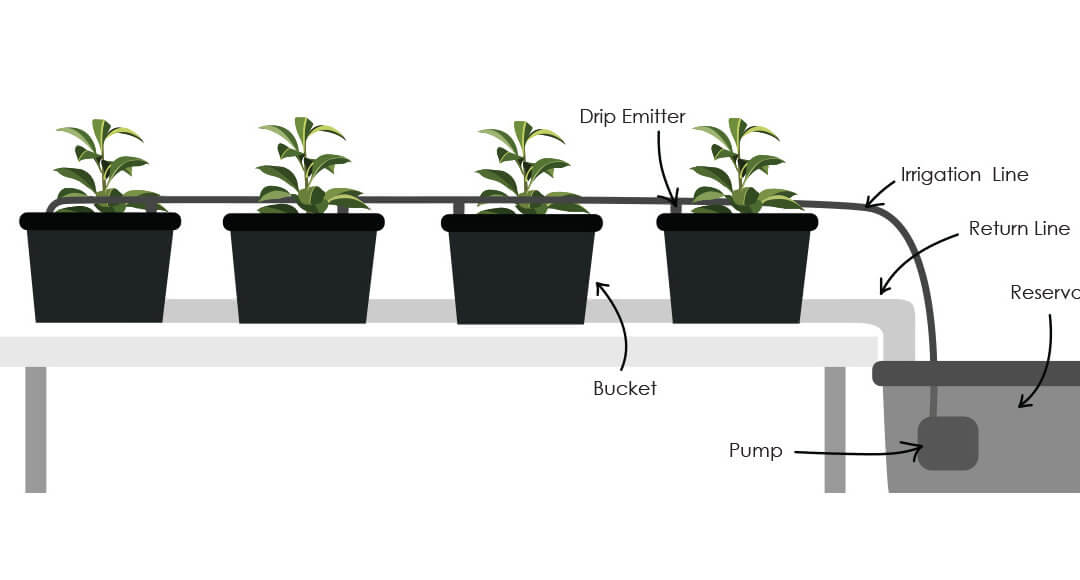
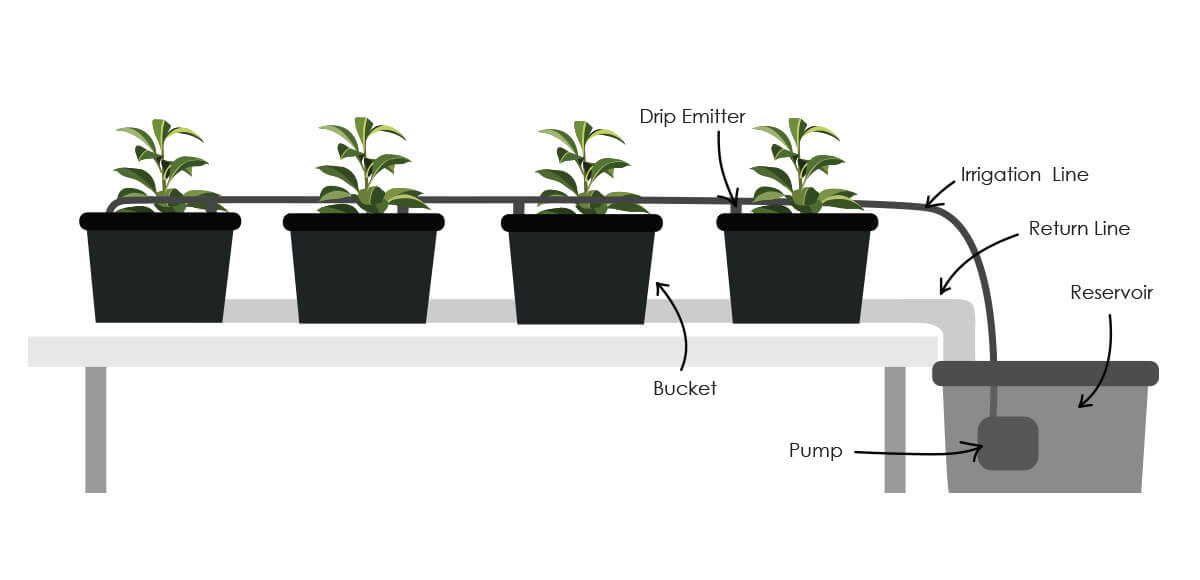
The design of Dutch buckets systems is very simple, with multiple variations on irrigation and equipment. A reservoir pump runs specially formulated nutrient solution through a straight line over the buckets. Drippers control the flow to each bucket, and solution runs through the media and then drains out of the bucket. Each part of the system has variations to suit grower needs.
Variations include:
The number of buckets: The tutorial below shows the design for an 8-bucket system. To build larger one-line system, growers may use a larger reservoir and pump, longer irrigation and drain lines, and simply set up the system the same way as the system below. For growers who wish to build a larger multiple-line system, we recommend going through the Dutch buckets course first to familiarize yourself with the technique.
Media type: Though the most popular Dutch bucket media is vermiculite, other media like hydroton or crushed granite may be used. Choose a media that will work for you. (Learn about the different types of media here.)
Minor components: Many components of the system—like tubing, drippers, fittings, and clamps—can be sourced from a home & garden supply store. The components that growers will probably have to order online or from a specialty store are the main reservoir, the buckets themselves, and the pump.
Growers should choose a number of buckets, media type, and know where to get components before they start building. The last (and most important) decision to make is the drainage setup.
There are two ways to run your drainage: flow-to-waste and recirculating.
Flow-to-waste irrigation
Flow-to-waste drains solution out of the system and away—forever. This option is more wasteful, but much simpler in terms of nutrient balancing.
What is nutrient balancing? Well, depending on the crop and its age, plants will take up unique ratios of nutrients. Younger plants of one crop might take up more nitrogen than older plants. Plants that are growing fruit might take up more phosphorus, etc.
Even though fertilizers are formulated to fit the crop, there are still minute differences in the ratio of nutrient to nutrient in the fertilizer and the ratio of nutrient to nutrient that the plants use. This means that over time, a solution can become unbalanced; one nutrient may accumulate while others are used up. This can lead to deficiencies and (less often) toxicities.
This makes flow-to-waste the simplest drainage technique.
Recirculating irrigation
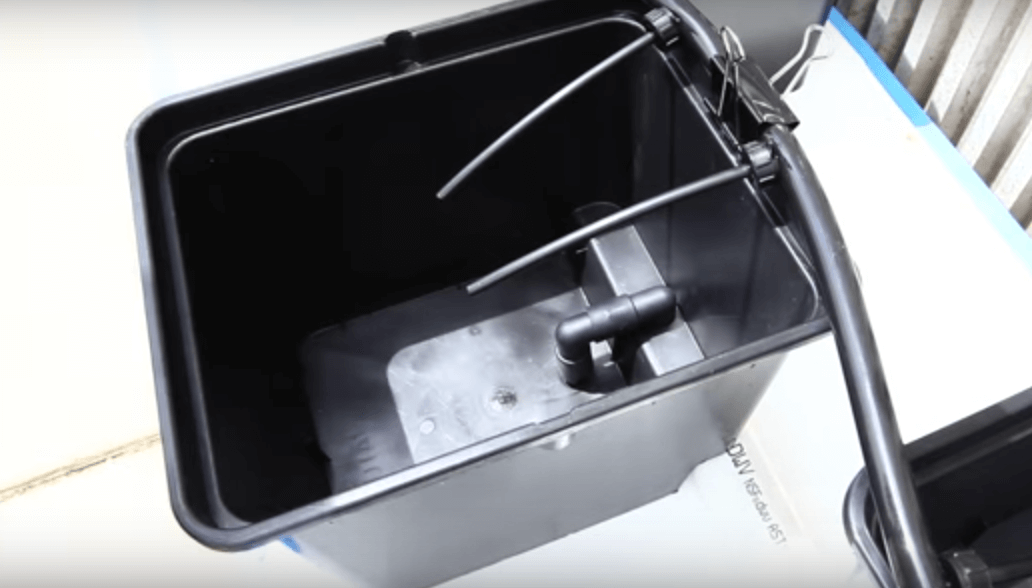
The more conservative drainage option is to run your Dutch buckets on a recirculating system. In a recirculating system, the buckets are irrigated and drain into a return line, a PVC line at a tilt that brings water back to the reservoir for reuse. (This is the type of system in the video below.)
Growers using recirculating systems can avoid nutrient imbalance by replacing the water every few weeks (this saves water and nutrients, and cast-off water can be used for other garden beds) or by balancing nutrients individually.
Balancing water nutrients individually involves getting a periodic water analysis to determine the levels of each element in the water.
Once low nutrients are identified, growers can adjust nutrients individually. This entails using a multiple part solution (some growers have solutions with as many as 11 parts) and can get quite complicated. We don’t recommend doing this without taking a course on nutrients!
The trouble with balancing nutrients is why many Dutch bucket growers use a recirculating system and refill it every few weeks.
Let’s learn how to build a simple recirculating Dutch bucket system.
Video: Building a basic hydroponic Dutch bucket system
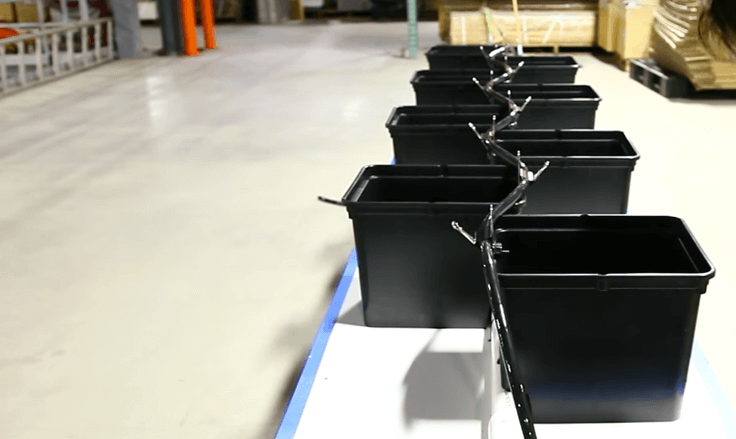
A benefit of hydroponic Dutch bucket systems is that their versatile design is very easy to build. This makes it an easy add-on to a system, and fairly quick for sourcing materials. In this video, Ruebin Buchanan shows how to build a simple 8-bucket system.
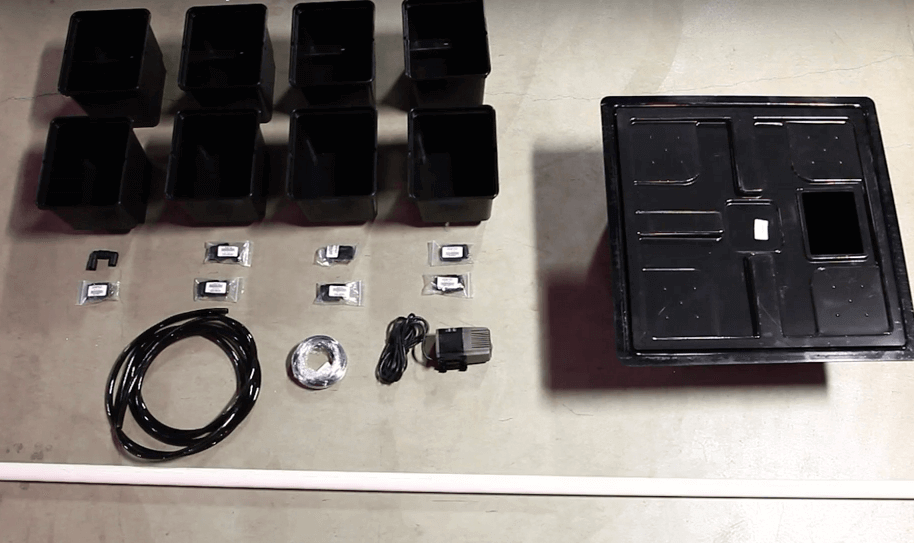 Parts needed:
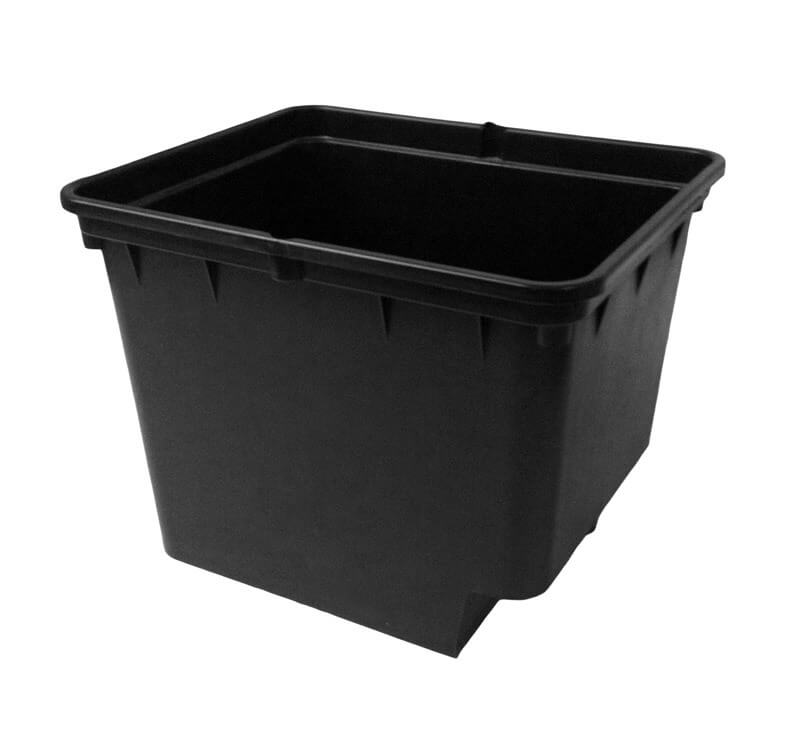
- 8 buckets
- 8 drain fittings
- A reservoir (we used this 15-gallon one)
- A pump
- 20 feet of 1/2 inch poly tubing
- 1/4 inch poly tubing
- 10 feet of 1.4-inch PVC
- 1/2-inch drain valve
- 16 2-gPH drip emitters
- 2 pipe clamps
- Zip ties
- Binder clips (or other clamps)
Tables and benches
You don’t need a table or bench, though it does make maintenance and cleaning easier. You can place Dutch buckets on the ground and plane it at an angle. If you do this, you will need to place the reservoir in the ground.
We built a simple table using 2X4s and a 2′ by 8′ sheet of melamine. If you use a table or bench, remember to add a slight tilt to the table so that it drains to the reservoir at one end. No matter how you support your hydroponic Dutch bucket system, the important thing is to give the return line a tilt.
How to build a hydroponic Dutch bucket system
 1) Cut PVC down to 8 feet or the length of the table, leaving room on the end for the end cap and elbow. Make sure it fits on the table.
 2) Place the Dutch buckets on the table and decide on spacing—mark the placement of the drains for each bucket on the drain line. (This video shows 8 marks at one foot apart.)
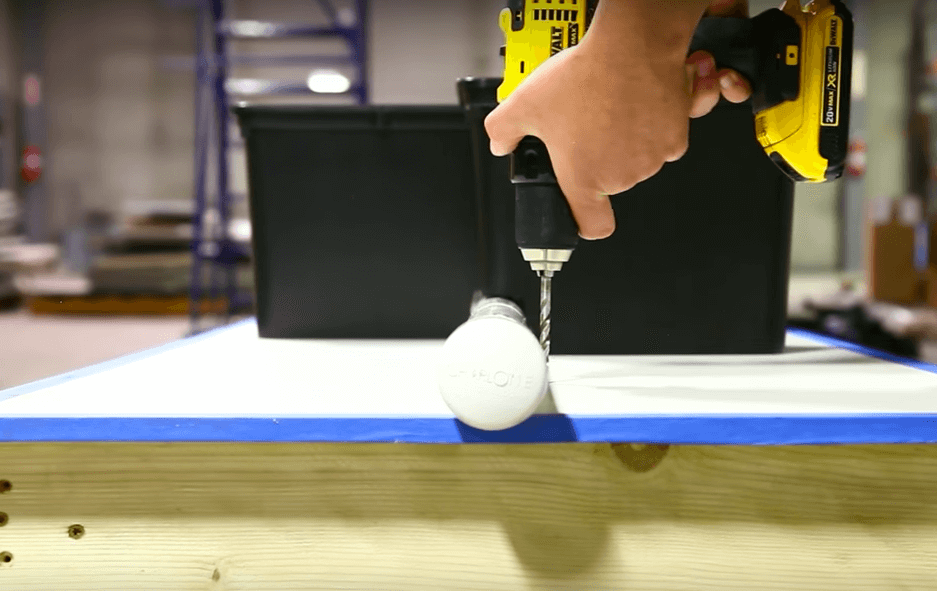
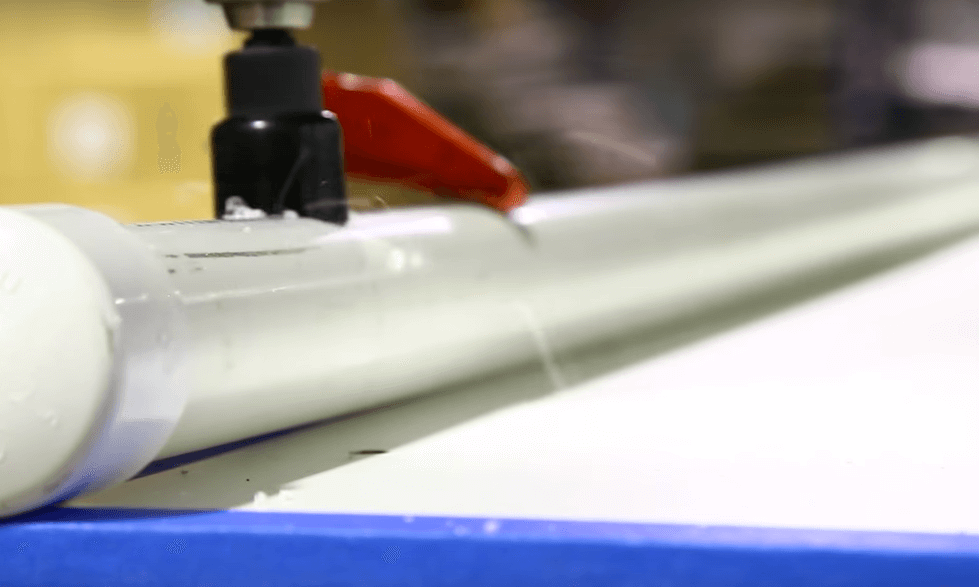 3) With a drill and a 1-inch hole saw, drill out holes on the marks.
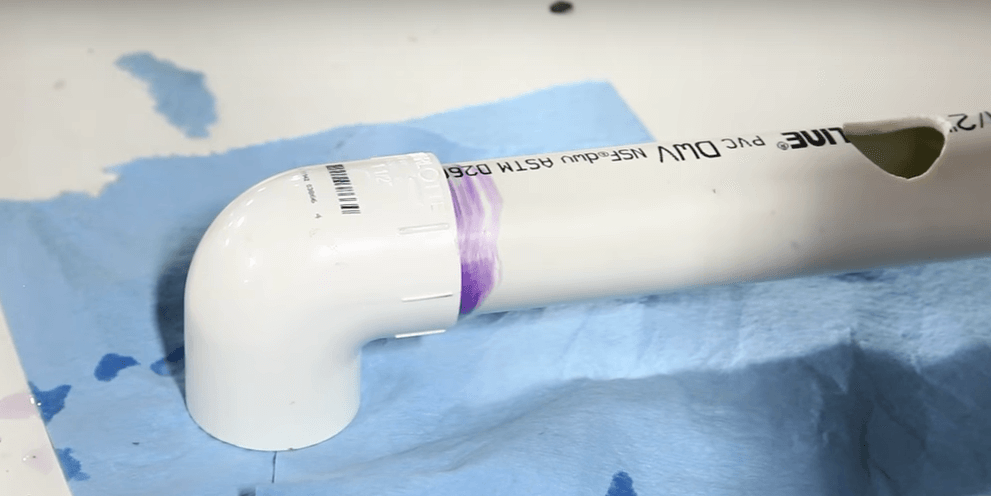 4) Use primer and PVC cement to attach the PVC end cap and elbow, making sure that the elbow is facing downward while the holes in the PVC are facing upward.
 5) Drill holes in the table on either side of the PVC to attach zip ties and hold the PVC in place. You could also use 1.5-inch conduit clamping here instead of zip ties.
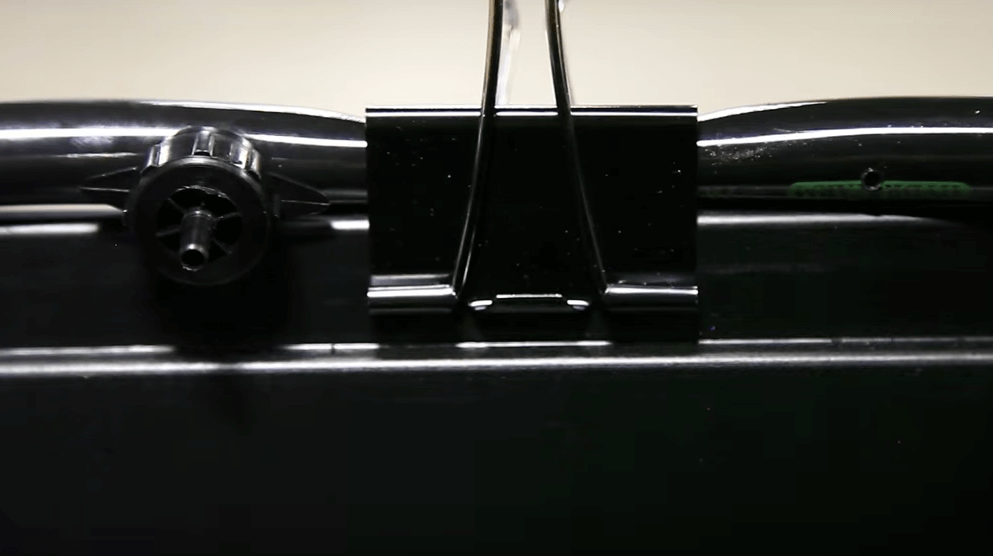
 6) Run the 1/2-inch tubing along the middle line over the buckets, fastening it in place with clips or clamps. Leave a few feet on the end to reach the pump in your reservoir.
 7) Using a 1/8-inch drill bit, drill out holes through the ply tubing on either side of the clamps. This is where we will put the drip emitters.
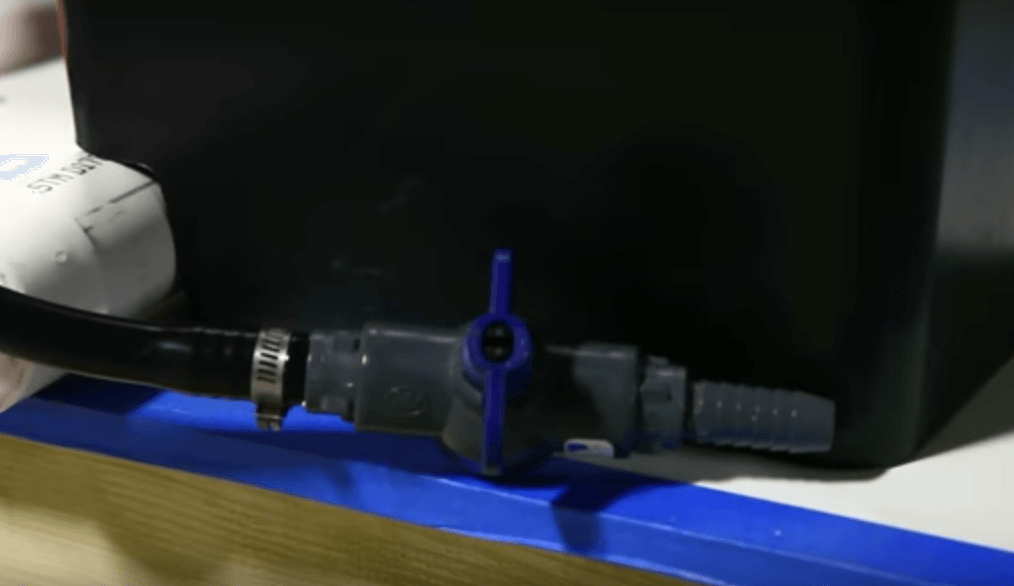 8) Next, cut the end of the irrigation line and add the release valve, which is good for flushing the system and draining the reservoir. Fasten it with a pipe clamp.
 9) Cut 16 5-inch strips of the 1/4 inch tubing and attach them to the drip emitters. These will center your irrigation to run directly over the plants.
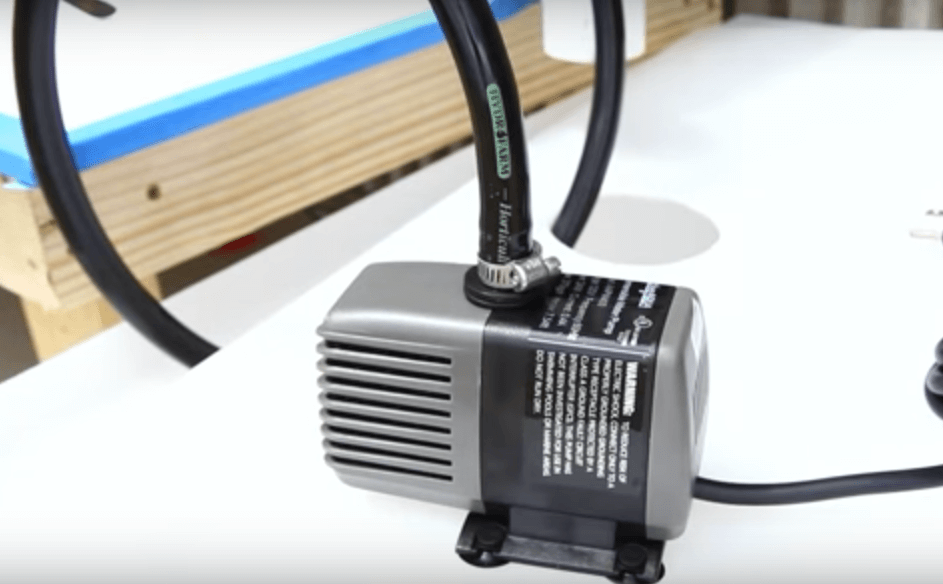 10) Attach the end of the tubing to the pump and fasten with a pipe clamp. Place the pump in the reservoir.
11) Test out the system and make sure that each drip emitter is functioning and no leaks appear.
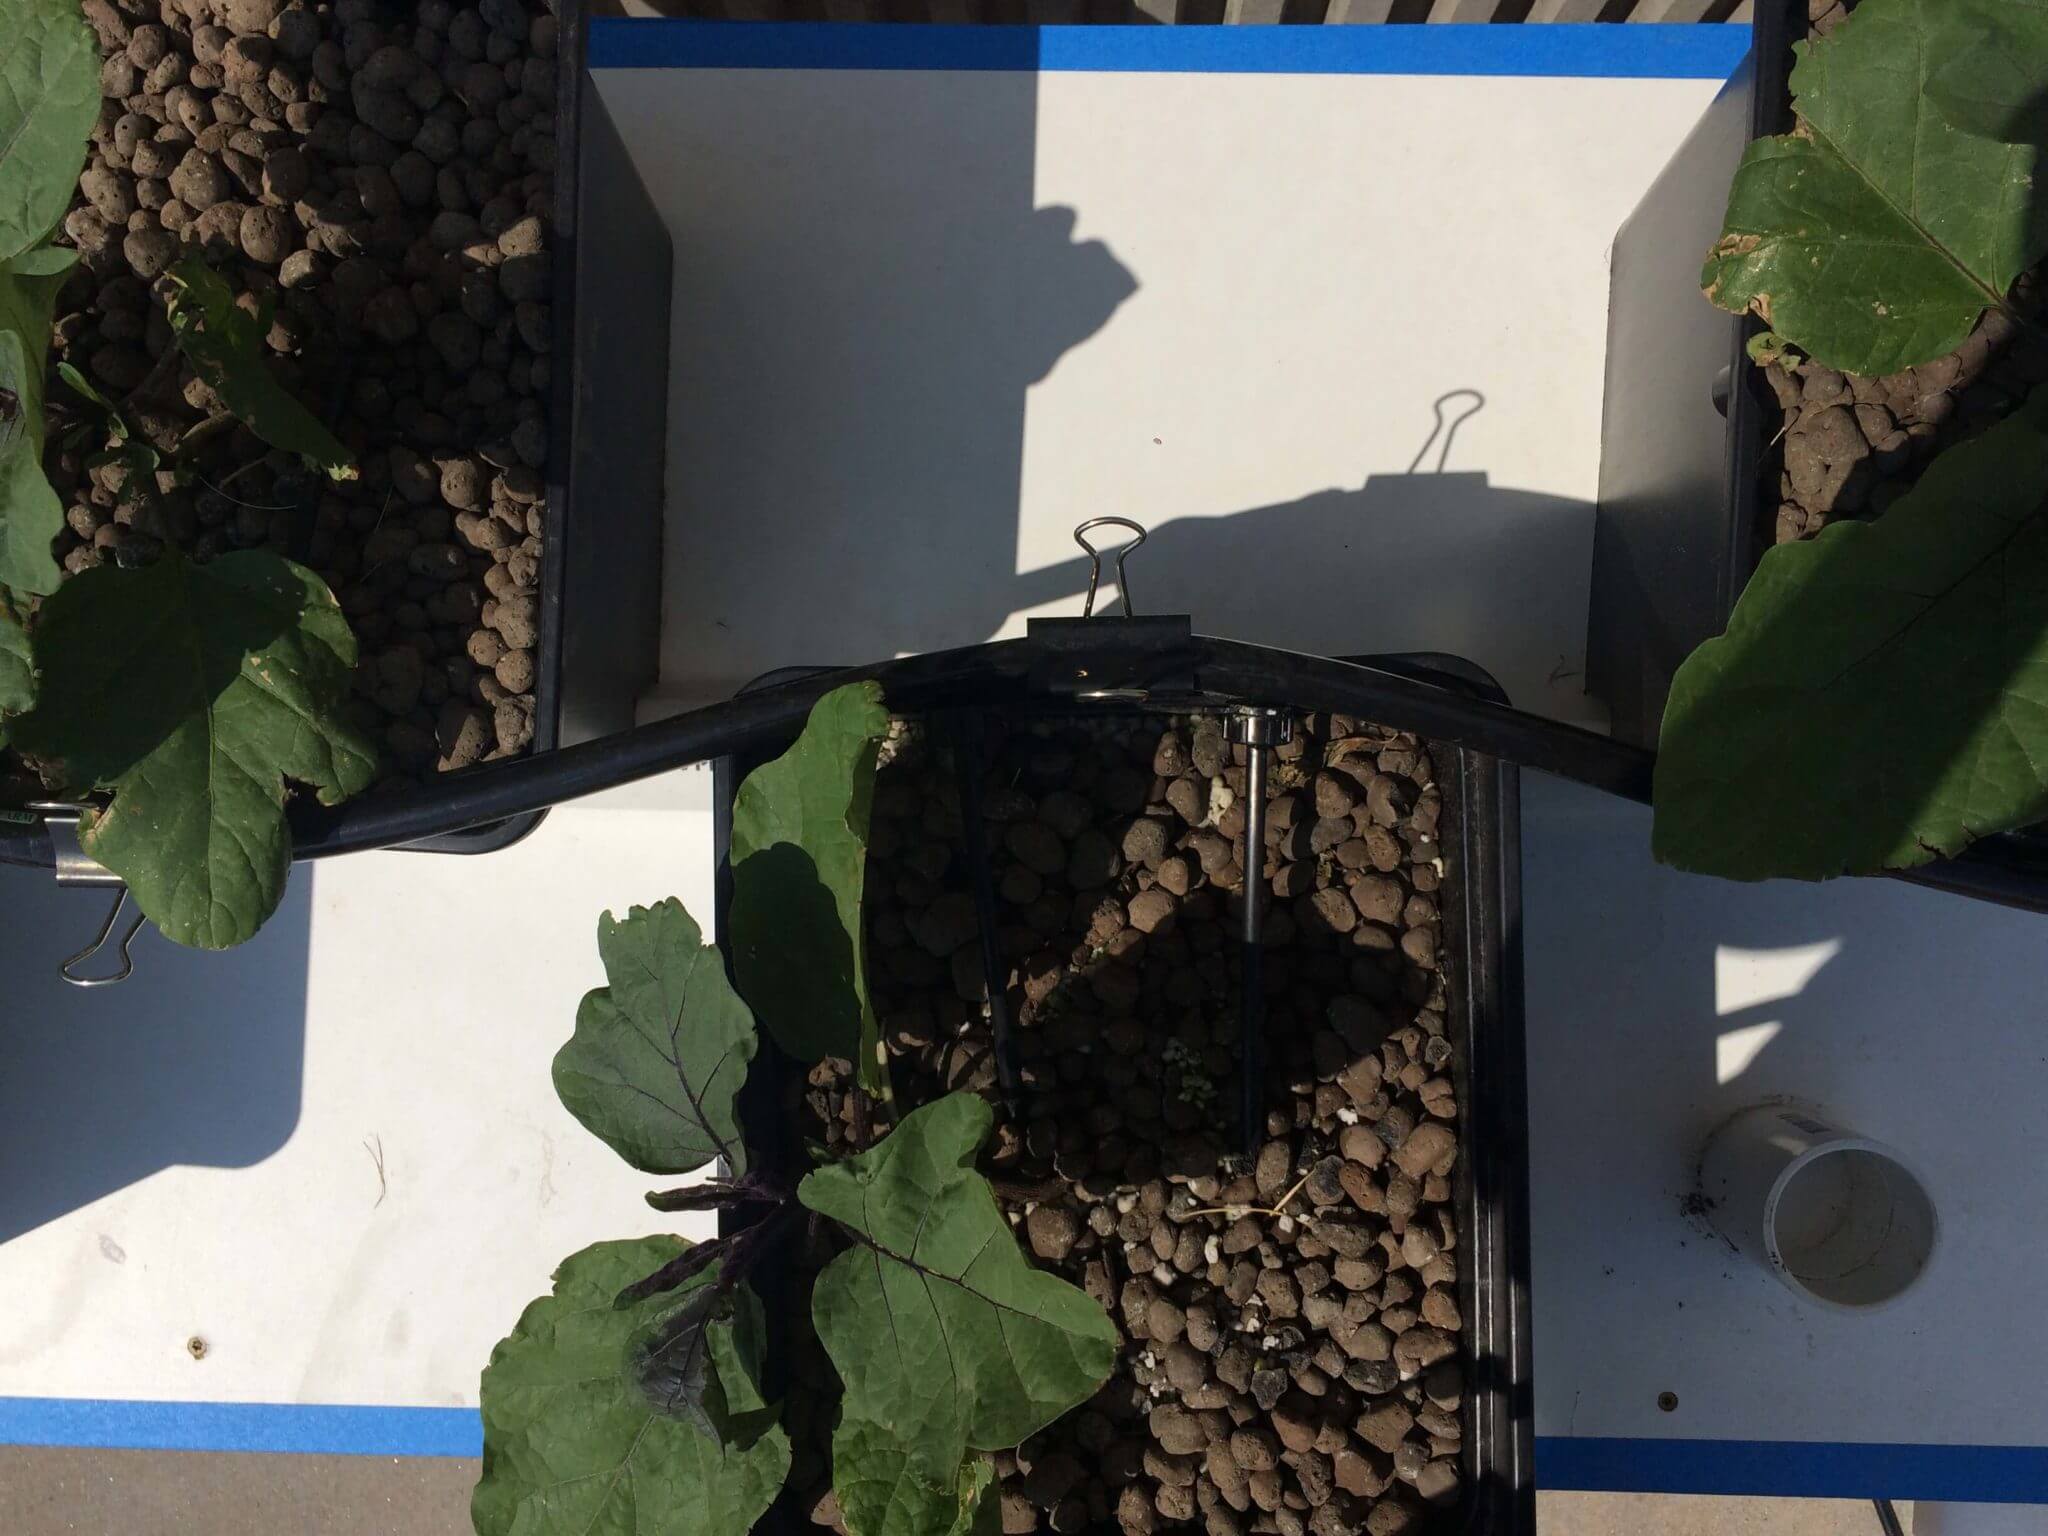
12) Plant your crops in the media. We chose a combination of perlite (the most popular filling) and hydroton (which keeps the Wyoming wind from blowing away the perlite).
Your hydroponic Dutch bucket system is ready to grow!

What is a 3/4 to 1 inch hole saw? Do you mean 3/4 OR 1 inch?
If the meaning is ‘OR’ how do I decide which measurement to use?
Hi Becky, the elbows that drain your buckets into your drain line will rest in the holes that you drill with the hole saw, so the hole just needs to be big enough for them to git. The elbows that come with the Bato buckets linked will fit snugly into a 3/4 inch hole. We went with the 1 inch hole saw to be sure.
How does the siphon elbow work in the Dutch bucket? Does it drain out entire water or would there be some water left?
3/4 to 1 inch in this context means that any size that isn’t smaller than 3/4 or larger than 1 will work.
3/4 inch to 1 inch hole either will do. Personal preference. Your lots would have a single drain hole and would over the hole in the piping to catch the drip.
What size bucket do you use and how does it hook in to the pvc line
How do you drill or when do you drill the buckets to fit the drains to go into the pvc pipe?
Hey Kelly, the buckets have drains in them already. We use a spade bit to drill a matching hole in the drainage line.
hello, don’t the roots of a tomato plant older than 4/7 months teach the drain tube?
Hi Amy, if I am setting up a bato buckets system with say 6 rows and I have one 1/2 in poly tubing run down each row, can I have each of the tubing run down the row and end or should it all run down the rows and then connect at the end too so that the water pressure is more even for the drippers? Also, if my pump is say 1000 gph stronger than the total amount of gph needed for all the buckets, do I need to use pressure compensating drippers?
Using pressure-compensating emitters or valves should take care of any pressure problems on your irrigation line. You can set it up almost any way you want that way.
Hey Ammy, having this system can I add to bucket rows such simple metal buckets (7-10 liters) or irrigation line has limited number of fittings? And if I can tell please is it necessary to make holes in the bottoms of containers.
Hi Viktor, yes you could potentially add on to a system like this.
I was thinking of making such a system but my main concern is how should I go forward: drain to waist or recirculating. I know that you need a certain pH of the solution else your plants will not be able to benefit from the nutrient solution that you provide. Using a drain to waist system, you have this problem solved. But, like the article states, it`s more wasteful when it comes to water usage. I like the recirculating system because it saves water (i`m planning on using rain water as well). My question is: then do you know then it`s time to change the nutrient solution? Because until now I was set on drain to waste in combination with rock wool and clay balls to better retain water because of the more stable pH levels. But now … i right back at 50-50. Thanks!
Hi Alex. It can be a tough decision. In the end it depends on your preference, but I will say this: drain to waste can still be conservative if run correctly (not over watering). If you decide to recirculate, you’ll need to pump drainage back to a sump tank where you can adjust pH and EC. Over time, the ratios of different nutrients in the solution will get a little wonky. We change out our hydroponic system water every 3-6 months depending on the system and crops.
Hi,
I built this system in my greenhouse. The minute I turn it on, the drip emitters drip water for 30 seconds or so then completely stops. Water is still flowing in .5 inch poly tubing. Sometimes only few emitters drip water and rest do not. I am using 2gph emitters & 370gph pump. Any idea what is going on? Would greatly appreciate your feedback. Thanks!
Hi Mike, if you’re using a labyrinth dripper it could help to remove the “innards” of the dripper. It could also be a pressure issue, but I’d try the dripper fix first.
Hello Amy,
I use 8 liters per hour (2 gph) dcs valves.
I also don’t get manure water through the valves. The manure water is pumped up, but does not come through the valves.
You said to look at the innards of the valve. I’m looking at a valve. But what should or could i get out of it to ensure that i get water through my valve. It looks like it needs some violence or not?
Hi,
I just built this system. When I first turn it on, the 2gph drip emitters drip water for 30 seconds or so, then completely stops. I verified that water still flowing with hign pressure inside .5 inch poly tubing. I am using 370GPH pump. Any ideas? I would appreciate your feedback. Thank you!
Hey Mike, it could be that the drippers are clogging with salt build up or algae. Try cleaning it to see if that helps. If that’s the problem, then labyrinth drippers could help.
Please suggest, Which type of Hydroponics system is best suited to grow stevia plants? and what nutrients mix to be used?
Hi Raj, we’ve grown stevia in ZipGrow Towers with success. Here’s what our farm manager has to say: We grew them in lettuce formula (they grew), but they may do better with the herb mix. The variety we had definitely preferred a higher EC and pH. It barely grew at 1.4 EC and 5.8 pH, and growth improved dramatically at 1.8 and 6.0.
i’ve tried a couple of pumps that I had laying around – including one that looks very similar if not the same as the one pictures as well as a Pondmaster submersible Model 3 that both should move plenty of water but i was not finding that my emitters would reliably water – of about 10, only 2-3 at a time would work. I hooked up a water gauge but it didn’t measure much past 1 PSI if that so im thinking the pumps i’ve tried move enough water but not at the right pressure? how do i look for pumps with the correct pressure – they all seem to have specs in gph rather than psi. Ive reseearched that the emitters work best with about 15PSI
Hi Ted, Check out this post on figuring out pressure/pump size: https://university.upstartfarmers.com/blog/sizing-a-pump-for-hydroponics-or-aquaponics
If your pump is big enough and you’re still having trouble, it could be a clogging issue. In that case, filtration and non-clogging drippers could help.
I had that same problem yesterday with water preasure I thought it was the pump but after going through the system I came to find out that with the emitters hooked up it was creating back preasure that slowed the water down so I hooked a splitter inline the line and ran it back to my solution tank to re leave the some of the preasure it has worked perfect ever since
Hi,,how many times a day the pump should be turned on?is it possible not using any media inside the bucket?
Thank You,
Hey Mario, Great question. Most growers prefer to run the pump constantly with a recirculating design. Others, especially those using drain-to-waste systems or systems with very little evaporation, only run the pump a few times a day. The frequency depends on the climate and the crops, but a good place to start is 3-5 times daily for 30 minutes. Watch your crops and then adjust it from there.
Hi, I’m building a seven bucket bato bucket system. This will be eight feet long and situated in my garage. How large, wattage wise, does the grow lite have to be???
Hi George, it depends on your crops and the type of lighting you’re using. To get started, I’d check out this post: https://university.upstartfarmers.com/blog/how-to-light-your-vining-crops-start-here
Hi Amy, Looking to set up a Bato bucket system for tomatoes and cucumbers. Likely 2 systems 8-10 buckets per line. My hope is to go with solar power. Could you help me identify a 12 volt pump that will pump at a flow rate/ pressure adequate to supply the amount of water I need for each plant.
Hi Mack, a 550 GPH pump should be more than enough for that system. More on sizing a pump here: https://university.upstartfarmers.com/blog/sizing-a-pump-for-hydroponics-or-aquaponics
Hi, I see the pH and EC for tomatoes, but what about cucumbers, peppers, and eggplants? I am building an 80 plant bato bucket system (recirculating) and intend on including as many of these various crops as I can which will share the same nutrients and tank. Do you see a problem with unmatched EC needs? Can you provide a list of other plants for this shared nutrients tank for bato bucket growing? Thanks for all your wisdom.
Hi JR,
Fruiting crops similar to those listed will all do fine at tomato recommendations.
hello where should i get the parts
Hey Omar, Crop King is our favorite supplier for Dutch buckets. They have a variety of products and a friendly team.You can see their catalog here: https://www.cropking.com/catalog/bato-bucket-systems-supplies
I LOVE THIS SYSTEM, AND WOULD LIKE TO HAVE IT FOR MY HOME.
DOES IT NEED MORE SPACE AND IS IT EXPENSIVE TO MAKE OR BUY?
How big of a bucket should i use
Hi Mia — The standard buckets are 9″ tall x 10″ wide x 12″ long. Check them out at CropKing.
Hi, i have DWC system (2 tank of 5 gallons) with a principal tank (11 Gallons), how can i calculate what i need as pump? and how many times can i run up my pump (for exemple every 2 hours/ run 1 hours…etc).
Thanks for your helps i appreciate 🙂
Hi Hatem,
Check out our post on “Sizing a Pump for Hydroponics or Aquaponics.” That should get you the information you need.
Thanks i appreciated
Hi,
Does the water drain out of the bucket completely between waterings? I have never tried hydroponics and didn’t know if the root were submerged in water or drained from the perlite and hydraton. Thanks, Dave
Hi Dave—
Dutch bucket systems typically water and drain back to the reservoir continuously—roots are not submerged. If you are interested in systems in which roots are submerged constantly, look into deep water culture systems.
Hi Mia,
I plan to grow Arabian Jasmine plants in dutch bucket system. Please suggest, Which grow media is suitable for it? and what nutrients mix to be used?. What is the suitable intervals for the pump to turn-on and up-to what duration?. I plan to construct a greenhouse and my aim is to grow jasmine Flowers commercially. A total of 1500 buckets.
Hi Joychan!
Coir, gravel, hydroton, and perlite are all appropriate media. Use a strawberry mix to begin. For the pump intervals, turn it on 4–6 times per day at 5–10 minutes initially, but adjust to the needs of your plants.
Hi!
here’s my question: how can you be sure the pvc glue (or primer) is not toxic?
Hi Mario,
Most regular PVC glue/primer is food safe and/or rated for potable water, some will even list this on the label. Once the glue dries, all the VOC’s will have evaporated leaving behind stable PVC resin. Gorilla glue PVC is pretty highly rated for being more eco-friendly and safe.
I am putting together a bato bucket, closed system. I am planning tomatos and peppers, total of 13 buckets. What is the best medium to use for this application? I have been looking at perlite and vermiculite, any thoughts? Thanks,
Is using vermiculite in dutch bucket system wise? I accidently set up my system with vermiculite. I thought I was using perlite, that is what I asked for at the nursery. I am worried that although I have read that it is perfect for starting seedlings, it may not be ideal for the tomato and pepper plants.
Hi Bogito Joe,
Vermiculite is fine to use in a dutch bucket, just keep in mind that it will hold onto more water and nutrients than perlite.
I think vermiculite is too fine it would go through the drainage hole.
Hi, I just took your bato bucket course. I still don’t understand how long or how many times a day I should be feeding for drain to waste and recirculating?
Hello
If I am running a drip 24 hours in a recirculating design then how many liters per hour per bucket should I drip?
Hello, First of all, Thank you very much for sharing this information is very impressive and so much useful for me. Keep it up a once again thank you so much:)
Amy–I have a dutch bucket system but the water does not drain all the way out. It maintains water in the bottom of the bucket. Last year was a total failure so am trying again this year. My tomatoes are about 12 inches tall. I just watched your vid on water changes as I was starting to see too many daily variances in PPM and PH. With this type bucket what do I do about the water that remains in the bucket or do I worry. I am using 15 minutes on 45 off for water cycle. pros cons? Local store sold me dyna grow 7-9-5 and mag pro for bloom 2-15-14 Pros cons Thank you!! Trying to learn and get some tomatoes!!
How much perlite is needed in each net bag using the Dutch bucket method? I may have too much. The nets rest on the drain line. Can you help?
How many power submersible water pump should I install for 24 Dutch bucket for tomato.
Can I set up nft for tomato plantation hydroponically with 8″ PVC pipe
Hi
I have an 8 bucket like the one in you vidio but I am not using emitters running out if i/4 line into top of bucket and runnig pump 4 times for 3 hrs out of twenty four. tomatoes lplant look terrible’ using general hydroponics for nutrient. any suggestions would be appreciated. thank you
Russ