
Should I grow microgreens?
Unless you’ve been living inside the greenhouse for years, you’ve probably heard of microgreens and the insane growth that this tiny little type of crop has had over the past 4–5 years. Chefs are using them in dishes across the country and they’re even showing up in farmers markets these days.
They’re extremely popular for their flavor and color on the chef’s side, but farmers have good reason to love them as well. Their high profit margin can help a farm weather lean harvests in other areas of the farm, or just boost the profitability of the farm as a whole.
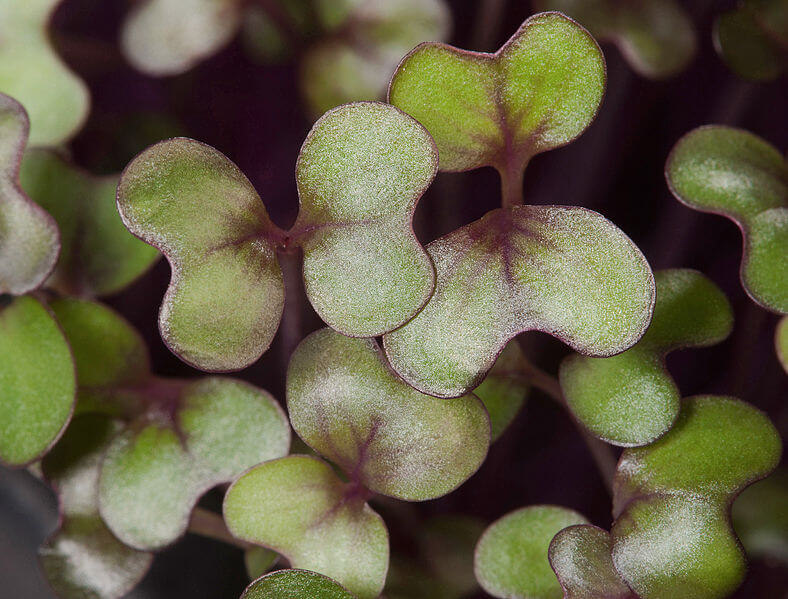
Photo by Peggy Greb
But how do you know if adding microgreens to your farm’s production makes any sense? To answer that question, we need to dig into how they’re grown, the economics of the crop, and how you might go about testing your local market.
Let’s get started.
The basic economics of microgreens production
Looking at microgreens from the perspective of a farmer, it’s no surprise they’re a popular crop. When you get into the raw costs of bringing a tray of microgreens to harvest, the margins are absolutely incredible.
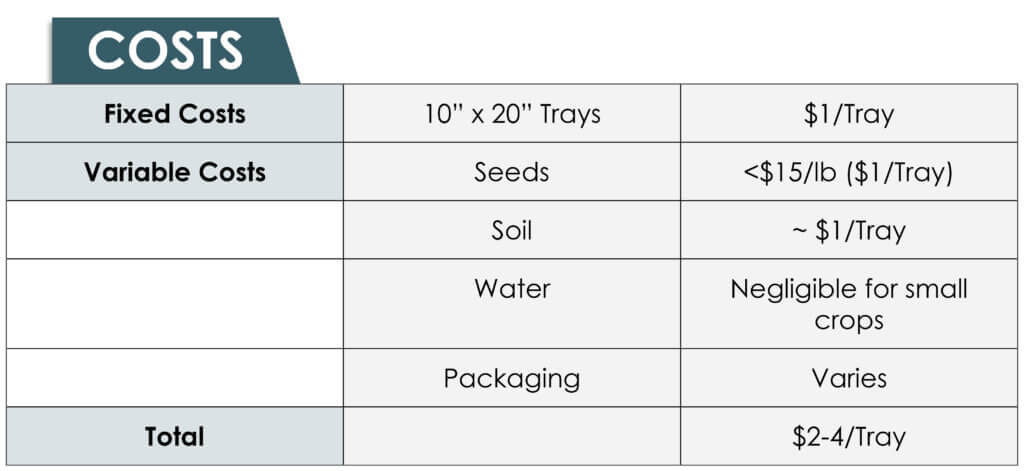
First off, you have your fixed costs. The beauty of microgreens is that you can keep these extremely low when testing demand in your local area. The only real fixed cost you’ll incur are for 10×20″ propagation trays, which run about $1/unit in bulk.
Now, your variable costs. Seeds, soil, water, and packaging are the big four here.
1) Seeds
Unless you’re growing very rare varieties—and you shouldn’t when starting out—most microgreen seeds cost under $15/lb, with discounts on bulk purchases pushing that number at least 20% lower.
For most microgreen varieties, around 1oz of seeds are used per tray, bringing the cost per tray down to under $1. There are special cases (cilantro, radish, sunflower, pea), but this is just a basic overview.
2) Soil
I like to use a 75/25 mix of potting soil and coconut coir, and the cost per tray comes out to around $1. This can fluctuate depending on how much soil you decide to use per tray. Some growers fill their 10x20x2” tray to the brim, and some only fill it halfway up.
3) Water
So low as to be negligible, at least when starting out.
4) Packaging
This can be a fixed or variable cost, depending on how you work with restaurants. Some prefer disposable packaging, while others are happy to reuse food safe containers over and over again.
OK, so microgreens have low costs, but how are yields?
So our actual cost of goods sold per tray is at or around $2–4, depending on the type of green you’re growing and your soil and packaging choices. But this number isn’t useful to us unless we plug in our yield per tray and what we can sell our micros for at market.
In my experience, most crops yield between 8–12 oz per tray. Again, there are exceptions for bigger shoots like peas, sunflowers, and radish, which can reach up to 12–18 oz per tray.
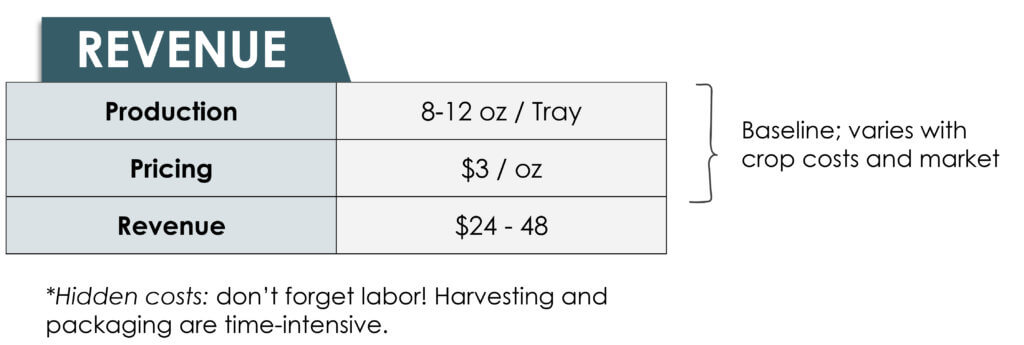
As far as pricing, while you can price each microgreen variety individually to maximize your profit per green (because some seeds are far more expensive than others), I find it’s best to charge a standard price per ounce at around $3/oz. You can make special exceptions for rare varieties like purple basil, shiso, etc., but this is a good baseline price.
This means that at the worst, your revenue per tray will hit around $24. At best, your revenue per tray can be up to $48. Your costs, on the other hand, are only $2–4 per tray, plus your time.
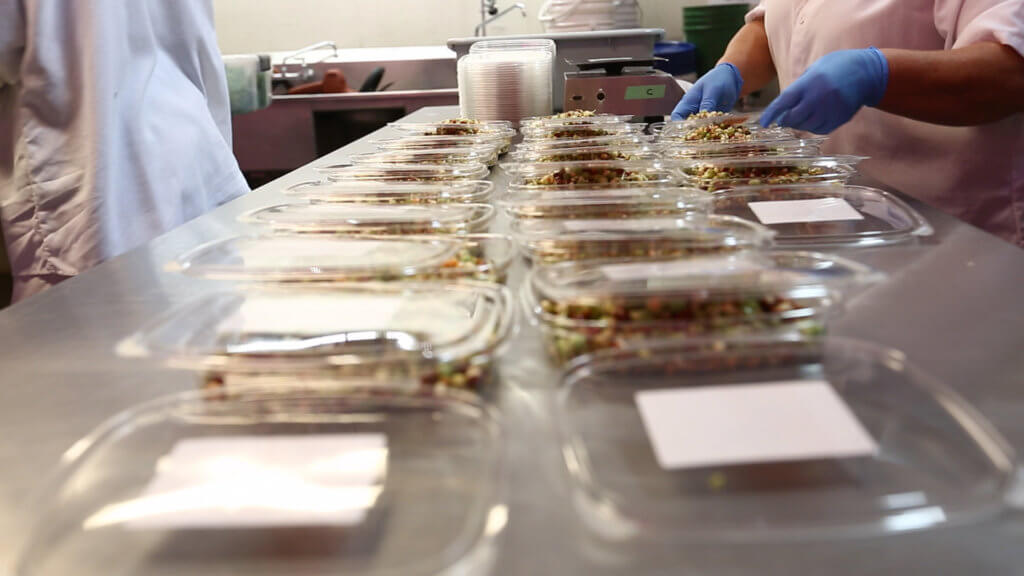
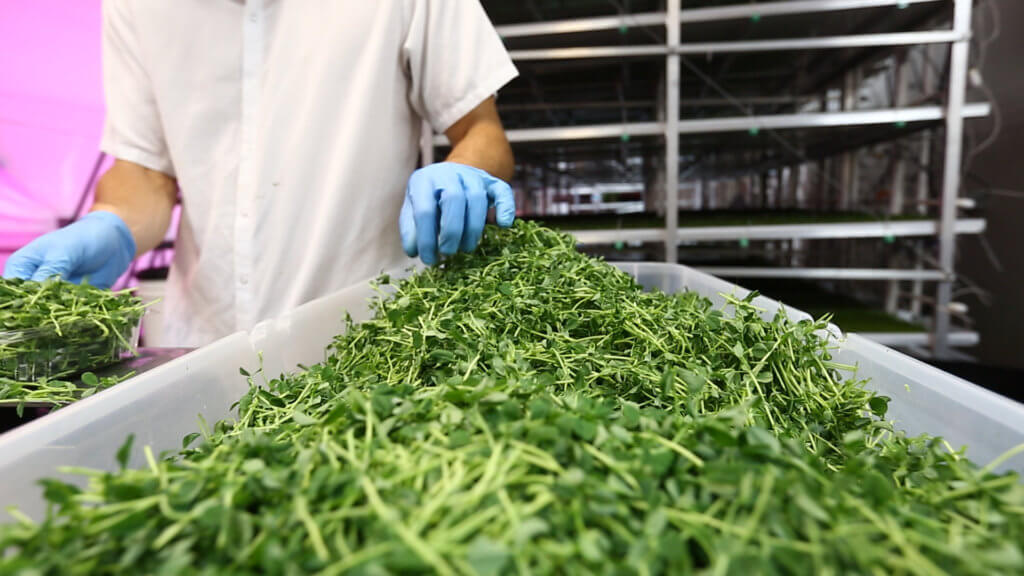
And that’s where we get into a sticky situation. It can take a lot of time to harvest and package microgreens, so streamlining that part of your operation will be crucial if you want to make this crop work in your farm.
How to grow microgreens—grow your first crop to test your market
While I could go into a wealth of detail on growing microgreens here (and I have on my site), microgreens are fairly simple to grow. If you’re interested in growing some sample trays to test out your market and see if they’re a good addition to your farm, here’s what I recommend.
1) Pick a few microgreen crops that are universally liked. Basil, arugula, radish, and sunflower are great ones to start out with.
2) Mix your soil, spread it into your 10×20 tray, and make sure you create an even, flat surface without compressing the soil too much.
3) Spread your seeds as evenly as possible, using around 1oz per tray unless you’re growing a larger seed like sunflower.
4) Mist your seeds lightly, then cover with another 10×20 tray for a few days
5) Check on your tray and mist daily.
6) A couple of days after your seeds have germinated, take off the blackout dome and expose them to the light. It’s time for them to green up.
7) Around a week after you uncover your trays, they should be ready to harvest.
Again, this is a simplified guide on how to grow microgreens, and I would direct you to one of my video guides if you want more in-depth information.
Testing your market: working with restaurants
After you’ve grown a few sample trays, it’s time to test the market. Restaurants will always be the best customer to go to when starting out with microgreens because they’ll purchase larger quantities on a reliable schedule. This allows you to streamline your production, because you know you have orders coming in on a weekly basis.
If you already have relationships with restaurants and chefs, the next logical step is to bring over microgreen samples next time you go in for a delivery. Explain to them that you’re testing out a new crop for your farm and wanted to drop off samples to see if it’s something they’re interested in.
Try to lock down a minimum order of $50 of microgreens. Anything less than that and it’s not worth the time to deliver to most restaurants unless you’re already delivering other produce to them.
If you haven’t worked with restaurants before, here are some pointers:
- The two best times are from 9–10 am and 2–3 pm. Never visit during service hours, unless you want to make yourself a new enemy.
- Emphasize how fresh and local your produce is. Chances are the micros they’re getting (if they’re getting any at all) are coming through a distributor and are both more expensive and less fresh.
- Try to speak with the sous chef. They’re one step below the executive chef and often make most of the purchasing decisions for the kitchen.
Go forth and grow microgreens!
So there you have it: a simple and quick overview of microgreens. If you can make these little shoots a profitable part of your farm, they can go a long way to adding to the bottom line. There are growers out there right now that specialize in microgreens only and make a healthy living for themselves and their family, so the proof is out there — it’s time for you to test it for yourself.
>>>You can get this article as a PDF here.

Kevin Espiritu is the man behind Epic Gardening, a gardening site dedicated to demystifying the secrets of the green thumb.
When he’s not knee-deep in his garden, he’s usually skateboarding, surfing, or reading a book.
Find him on Twitter, Instagram, and Facebook.

Happy to answer any questions in the comments here!
Thanks for this great post Kevin. From your experience, what would be the best varieties to grow for a first test with restaurants?
You’re welcome Julien! Arugula is always a winner, but so are pea shoots, sunflower shoots, and radish shoots. Out of those, radish shoots are by far the easiest. Try to pick up a colorful cultivar. Hope that helps – Kevin
Thanks a lot Kevin! Cheers
Hi Kevin, this is a great post. Can you recommend where to buy cheaper microgreens seeds. Most of seeds sellers prices are too high.
Thanks! Michael
G’day Kevin
i am looking at greenhouses and how to control the humidity in there,is there any where i could find a layout for that setting up of all of that .
Randall
Hi Randall I have picked up a book from the library here called “The complete guide to DIY Greenhouses”. It talks about more grassroots type of greenhouses not big the big commercial ones. The author is Black+Decker, Published by Cool Springs Press, Minneapolis, Minnesota.
So that is where I am “at” …
I have Worked in many Restaurants In 20 Years Of Front Of House service But I Know that Once that First Sale Goes there Must Be Product in less than 2 weeks. Its that first sale that Has me a Bit on edge…
Hi Kevin, Can micro greens be grown in a hot climate such as in Spain in a greenhouse? Are there any particular varieties most suitable to that climate? Do they travel as well as other vegetables? Peter
Hi Peter,
Microgreens can be grown in such climates, but keep in mind that maintaining proper watering intervals will obviously be much more critical. Most herb varieties will be better suited to warmer temperatures. Cool weather varieties can still be grown but the heat may alter the flavor profile. Check out this blog post for more details on environmental conditions.
Microgreens can be transported very will if they are still in the media. If they have been cut, they will need to be shipped with refrigeration.
where do you purchase/source for your seeds?
I got mine from Everwilde Farms!
Thanks Kevin sir my self vinod suryawanshi from Mumbai India
I want starting in microgreens busines in my areas
My email suryawanshivinod18@gmail.com
Hi,
First of all hats off for the best article about micro-greens for beginners on net.
I have a problem cultivating with raddish microgree as they look so down asthey grow and easily attractive to moulds growth at stem though i am misting moderately twice a day.
Thank you ,
Gowthaman.
Thanks! Be careful not to plant too dense. Radish germinate quickly, so be sure to uncover them as soon as they sprout so they can get some sun and not get too leggy (thus collapsing).
What accounting software should we use when getting started?
Hi Gerry – a lot of folks have had luck with QuickBooks.
I’ve seen a lot of people just using Microsoft excel.
Hi Kevin, Where did you find trays at $1 each?
We can find them for a $1 around here at local garden centers/greenhouses. Online if you buy from someplace like Johnny’s seeds it gets close to that cost.
i have been looking for a better supply for seeds within Malaysia, any recommendations? seeds for microgreens and hybrid seeds of cabbage, lettuce, eggplant, cauliflower, cucumbers, etc
Excellent, concise information. I’ve been searching articles galore and you answered nearly all my questions in one fell swoop and brought up points I might not have thought of in time (off hour visits to restaurants).
Hi
Would you know of any suppliers in the UK.
I want to start growing microgreens and need to buy trays, seeds, coconut fur all the materials that you described
HI KEVIN, i AM CHUCK AND WAS WONDERING IF PLANTS COULD BE ALLOWED TO GROW TO MATURITY AND USED FOR GETTING SEED
Hey Chuck,
If you’re interested in growing mature seedlings for transplant, you will want to take a slightly different approach. Check out our Seeds & Seedlings course.
Hi Kevin,
I’ve been growing microgreens for about 6 months. Our rainy season has now started and even though I grow my microgreens indoors, I’m having problems with condensation on the leaves especially with the trays that are more densely planted like kohlrabi and broccoli. The problem is the moisture leaves the plants wet when harvested and they don’t last as long. I don’t wash my microgreens so don’t have a dryer or anything. What I am doing is harvesting then laying them on a dry clean cloth in front of a fan but this is not ideal. Do you have any ideas to reduce the moisture or dry the harvested greens?
I use a box where top and bottom is made from mosquito net. Just use a fan on top and something to collect the drops at the bottom.
How and what do you use to mix a sanitizer for microgreens, using hydrogen peroxide.I have seen people use it but they do not tell you how to mix it .
Jolene—
Just use food-grade peroxide and plain water.
Thanks for this useful post!!! This guide will be really helpful for beginners who are planning to grow microgreens and interested in the pros and cons of microgreen production.
Kevin,
Thanks for the article. One lingering question I have is what to do with the soil? Can it be composted and reused, or is it spent and I have to keep buying new soil (and dispose of the old)?
Hi there—
You can reuse it if you properly compost or sterilize it before resuing. The trouble is that if it doesn’t heat up enough, it could develop disease issues eventually. Other types of media, like hydroton or something similar, can more easily be sterilized and reused.
any info on how much cost to start a 2,000 sq ft area micro-green farming in a basement ?
thanks so much
I certainly don’t know where you can get seeds for less than $15 a pound, and the packaging you say variable but can be more than everything else total.