The Ultimate Guide to Starting a Farm
Steps to starting a farm
If you’ve decided to become a part of the new food system, you’re in the right place.
This is your step-by-step guide to starting a farm. Use the checklists and resources in each section to make sure that you’re diligently planning for a profitable farm business!
Step 1: Decide to Put in The Work
No matter how much technology you plan to use, farming still requires a lot of time and perserverance to be successful. There is no “easy” farming business!
Today’s Farmers are:
-
Self-motivated.
-
Driven to reach a goal.
-
Always humble enough to know there’s always more to learn.
-
Not willing to give up when things don’t go their way the first time.
Free Webinar
“How to Stop Talking & Start Farming”
Step 2: Find Community
Community & Mentorship: No farmer starts and runs a farm entirely on their own. Getting connected to those with experience, as well as other aspiring farmers like yourself, will help you stay on track and avoid mistakes.
Anyone starting a business should look for three types of mentors:
- The first type of mentor may be the people whose blogs you follow or whose books you read.
- The second are people who will eventually be your compadres; fellow farmers like Ryan Sweeney, Matt Marsh, and Tom Deacon (all of whom you can follow on social media).
- The third type of mentor is the direct mentor. This could be an experienced farmer, a knowledgable account manager, etc.
Step 3: Set Goals & Draft a Plan
In this phase:
- Draft a business plan
- Feasibility Study
Initial Planning: It’s time to set some goals and draft your business plan!
One of the biggest mistakes would-be entrepreneurs make is procrastinating on their business plan. Another important role of the business plan is to aid in securing funding; many banks and other lenders won’t even consider applicants that don’t have a business plan.
Learn how to write a business plan with this guide.
Get real-life insight into running a modern farm through these tips.
What is a feasibility study?
The feasibility study is the group of research and estimations that answer the question, “Can I make money with my farm?” It covers…
- Revenue projections
- Fixed and variable costs
- A market survey
- A conservative pricing strategy
- A capital expense budget
- A look at your energy costs
- Detailed pro forma projections covering cash flow, net income and balance statements
Step 4: Learn to Grow
In this phase:
- Learn from Upstart University
- Start a pilot system
Even though we’ve focused a lot so far on the business side of things, it’s critical aspiring farmers start a pilot system as early as possible to learn the in’s and out’s of soil-less growing. This is where you’ll learn all about growing healthy plants and work through some beginner system mistakes before you have any customers.
We highly recommend Upstart University to anyone starting a modern farm. You can get signed up here and choose your first courses.
As you learn more about different growing techniques and crop management, you’ll start to form preferences for your farm. After taking courses like these, you’ll be able to make good decisions about how to grow and what to grow.
The Importance of a Pilot System
To amplify and accelerate your grower’s education, start a test farm. You can take all the courses and read all the blog posts you want, but if you’re not applying what you learn, it’s not sticking like it could.
A “pilot system” is a smaller version of your future farm that allows you to test the waters, make mistakes, and start developing processes and best practices that allow you to scale seamlessly into your full production farm.
The other BIG benefit of starting a pilot system is you can use it to grow sample crops for approaching customers and proving demand. Having real produce in hand when talking to chefs and produce managers has helped many of today’s top farmers close their biggest deals. Prospective customers fall for the flavor and freshness instantly!
Step 5: Find Your Customers
In this phase:
- Market research & sales planning
- Putting market research to use
Market Research & Sales Planning. You can have the freshest, most flavorful crops in your city or town, but if you don’t have customers to buy them, you might as well close up shop. market research is where you define profitability.
You’re going to complete two types of market research: General research and local research
The most important part of local market research is getting face-time with potential clients. This is the only way to get truly accurate local sales and pricing data.
To get started, use this worksheet. It helps you cover all your bases and keep all the information you find in a useful format. Modern Farmer’s Guide to Local Markets (Worksheet PDF)
How to put local market research to use
The most immediate thing that market research allows you to do is find an entry point.
A key part of your entry point will be deciding on a sales model. Simply put, a sales model is the set of processes and tools that you use to get produce from your farm into the hands of the consumer. Live Sales is a popular model for ZipGrow farmers like Lukenbill.
Review your sales model, target markets, and everything you’ve learned about your growing technique and crops so far. As you do that, you’ll notice certain strengths and values that give you an advantage over the other producers active in your market.
These strengths are your value propositions- the reason that people buy your produce over others. You’re going to want to play them up in your marketing.
Up Next – Learn about Funding & Debt
Step 6: Estimate Funding & Debt
In this phase:
- Funding
- Debt
- Able farm planning software
FUNDING
If you don’t have much experience with funding, you may feel like you are shooting in the dark.
Don’t worry; we’re here to help. Before you start searching and applying for funding, take these three steps:
1. Know your goals and starting size
2. Demonstrate how much demand there is for your crops
3. Get your financial house in order
Learn more here.
When you’re ready to start looking at funding, you have several options:
- Loans
- Private investment/venture capital
- Equipment leasing
- Crowdfunding
- Grants
Learn More:
DEBT
Debt is an inevitable result of lending and the baggage of many types of funding. That being said, many farmers have started farms without debt (or with very low debt)
Either way, farm owners must be comfortable with the level of debt that they are pursuing before starting their farm! To make the best debt decisions for your farm, you need to understand the types and factors of debt.
There are eight types of debt that new farmers might incur:
1. Secured
2. Unsecured
3. Fixed interest rate
4. Variable interest rate
5. Fixed payment term
6. Variable repayment period
7. Deductible
8. Non-deductible
Learn More:
- The Fair Debt Collection Practices Act
- Summary of the Fair Debt Collection Practice Act
Step 7: Plan Your Facility
In this phase:
- Choosing the right facility
- Common trends
Choose the right facility. Modern farmers are using all types of facilities, from greenhouses and warehouses to basements and backyards. Different types of equipment and production methods work differently in different facilities. Your production methods will dictate to a significant extent which type of facility you use.
Here are the common trends we see:
DWC (Deep water culture) systems are typically run in greenhouses in tropical areas. The high labor requirements and large footprint of the technique are best suited to places where labor is cheap and space isn’t too cramped.
NFT (Nutrient film technique) systems are run either in greenhouses or in stacked systems in greenhouses or warehouses. The first facility is best suited to this technique.
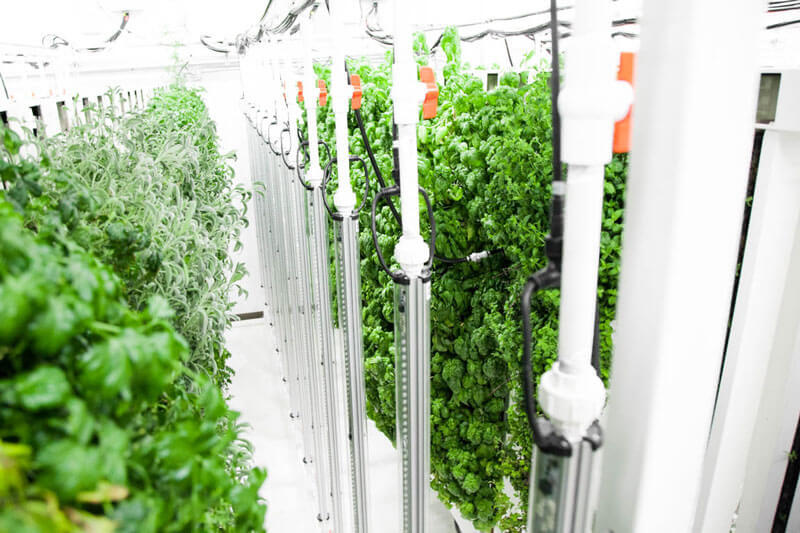
ZipGrow Towers are used in greenhouses, backyards, and homes. Since they are so modular (each Tower is separate), they can fit into almost any space in any quantity.
ZipFarms are ZipGrow-based systems specially designed for warehouse use. They consist of ZipGrow Towers on a rolling rack with a light rack overhead; they are pre-configured but set-up can still vary by quantity and orientation.
Media beds are best for outdoor or greenhouse facilities. Media beds tend to be heavy with high thermal mass and a large footprint. Media bed growers don’t move their equipment, and stacking is out of the question. That makes them a good fit for places that aren’t tight on space.
Bato buckets are primarily used in greenhouses, with some indoor facilities. Most hydroponic tomato systems are bato systems (or “bag systems” which function similarly). Most of these systems are in greenhouses.
If you aren’t sure which grow method is right for you, take the Upstart University Course “Choosing Your Production Method”.
Modifications to the facility will have to be made on a case-by-base basis but could include:
- Insulating
- Sealing
- Electrical additions
- Chiller installations
Of course, some facility characteristics need to be in place before purchasing.
For example:
- Adequate ceiling height
- Minimum dimensions
- Exit access
- Wall protrusions
Step 8: Implement Sales & Marketing Plan
The main tasks of Sales & Marketing are:
1. Creating a brand
2. Creating action plans for your markets
3. Getting payment plans ready
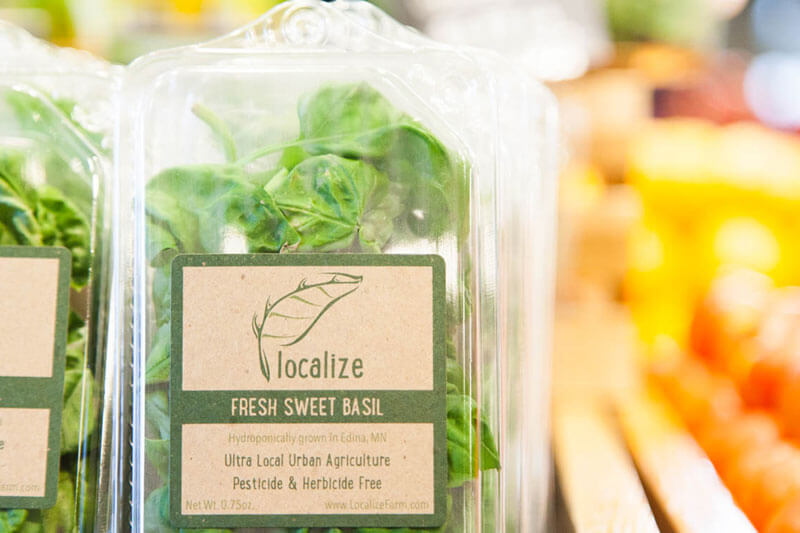
Branding includes core language like a farm name, values, and mission statement language, as well as the design of your packaging, web site, social media, etc. In all, the farm branding is the way that your farm presents itself to the world.
The difference between poor branding and good branding can often be the difference between good market cap and low market cap, high-quality leads and poor-quality leads, etc.
Bright Agrotech offers help on small farm branding, complete with templates and custom help on:
- Packaging
- UPC Barcode Creation
- Business Cards
- Letterhead
- Logos
- Website Design
Learn More:
Learn More on choosing markets:
CSA Resources:
Grocery Store Resources:
Restaurant Resources:
Farmers’ Market Resources:
Collecting payment
Have payment methods ready and accounting practices in place to keep your farm accounts organized and easy to assess.
1. Set up bank accounts for your farm business
Set up a separate bank account for your business. This is one indicator to the IRS that your farm is an actual business, which will make taxes and audits much smoother down the road.
2. Set up payment tools like Square and Quickbooks
Some farmers use plain old cash and checks to receive payment from customers, but in some situations it’s good to have other options. For example, many market goers only carry a card for payment. By limiting payment to cash or check, you may be missing out on significant business!
In addition to accessible payment, many payment tools like Quickbooks are combined with other account management tools that can make accounting much easier.
Your accountant may have recommendations and preferences for payment systems! Be sure to consider their preferences, since they will often be the main person using the system.
Step 9: Organize Business Operations
During this phase, you will research and plan:
- Your business structure
- Insurance needs
- Employment & taxes
- Zoning requirements
- Certification processes
- How to choose a good business partner
BUSINESS STRUCTURE
Choosing a business structure helps you determine who’s accountable for each component of your business’s operation. It also helps to give investors and banks a clear picture of who you are and who’s leading the team.
The three most common types of businesses for small farmers are sole proprietorships, partnerships, and corporations.
Sole Proprietorship
A business organized as a sole proprietorship is owned by a single individual or family and is not organized as a corporation. This is common, especially in agriculture, and it gives the owner of the business a ton of control/responsibility.
Partnership
A partnership is owned by two or more people. We recommend having a written partnership agreement so that each partner knows what their responsibilities are. Oral partnership agreements are legally valid, but they are more difficult to defend in the face of a dispute.
Corporation
A corporation provides owners with protection from losing more than what they invested if the business fails. It is a special legal entity endowed by law with the powers, rights and liabilities of a person.
** It is important to note that there are other ownership forms out there. Before officially declaring and filing for your form of ownership, we rfecommend that you consult with a lawyer. This page does not constitute legal advice.
Read more about the advantages and disadvantages of each of these models in the Upstart University Course Intro to Business Planning.
INSURANCE
Even if you’re selling solely to markets that don’t require proof of insurance, you still need to cover your farm’s liability. Selling to a market that didn’t require proof of insurance doesn’t mean that you can’t be sued.
Upstart Farms should carry a general liability or umbrella policy on their farm.
You want to have insurance that protects:
- The product liability of your produce and food items
- Your farm assets
Additionally, your may need other kinds of insurance, like auto insurance for farm vehicles (think about what car/truck you use to transport your towers live to market).
Our Tips
Use an insurance broker. When searching for insurance for your farm, it helps to use an insurance broker. A broker will go out and get quotes from dozens of insurers, coming back to you with the best policy.
Get plenty of coverage! The amount of coverage that you obtain depends entirely on your farm. At the bare minimum (and seriously – this is the absolute minimum), a farm will want at least $50,000 of insurance coverage.
Consider what kind of business your farm is doing. If you expect to do $200,000 in sales this year, have your insurance cover $200,000 to $400,000. Your broker and agent may be able to offer a specific recommendation for your farm – use their advice!
EMPLOYMENT & TAXES
There are several things you need to do with your farm before hiring. It’s not a bad idea to research these, even if you don’t plan on hiring right away!
** We are not a substitute for a certified accountant! Please hire an accountant to make sure you’re following regulation and laws for your state.
Business
- Register your business
- Get your employee identification number (EIN)
- Get workman’s compensation and unemployment insurance set up
- Register to file taxes (start here)
- Research labor laws
Hiring & HR
- Fill out a W4
- Fill out an I9
- Safety training
Other Considerations:
- Non-disclosure agreements
- Sexual harassment training
- Fire & evacuation training
*HR platforms can be helpful for keeping information straight and creating a professional processes. A few examples are Zenefits and Greenhouse Software. There are several free programs.
Payroll
You can pay employees whenever works well for you and your bank, as long as it adheres to your State’s / the Federal Minimum Wage,
Payroll systems are highly recommended. Some examples are Quickbooks, Paychex, ADP, and (only accessible in some states) Zenefits.
You’ll pay taxes when you do payroll. In addition, you’ll have to submit a 9-41 form quarterly, and 9-40 and W-2 forms at the end of the year to the IRS.
Certain states also apply a state income tax.
Hiring an Accountant
A certified accountant can help you keep your finances and legal obligations orderly. They will be able to coordinate tax forms and make sure that you don’t miss deadlines, payroll, and other tasks!
Be sure that:
- They are familiar with your business and sales models
- Their rates are within your budget
- They are experienced with the specific services you need
CERTIFICATION & COMPLIANCE
HAACP, sanitation procedures, GAP compliance, and Food Defense.
These certifications indicate that your farm is up-to-standard in areas of safety and sanitation across your farm:
- worker health and hygiene
- water and sewer quality
- air quality
- pest control and wild/domestic animals
- nutrient systems
- state and federal traceability
- harvesting sanitation
- processing
- storage and transportation
Start with Upstart University Course: Farm Compliance & Food Safety.
ZONING
Zoning, a land-use planning system used by cities and counties, plays an important role in siting a farm. Urban farmers want to grow in a zone with favorable regulations and which doesn’t eliminate any of their farm processes. See an example here.
There are five basic zones:
- Industrial
- Commercial
- Agricultural
- Residential
- In-field development zone (can be used for all kinds of purposes)
The best first step is looking up the zoning regulations for urban farms or for a specific zone in your area. Most cities list their zoning maps and laws online.
Learn more about how an urban farmer can navigate zoning regulations.
PARTNER CONTRACTS
Your business partner will be a critical part of the business equation, and can either be a very strong point or a very weak point in the business structure.
Despite the relationship being important, many new business owners don’t plan the partnership very carefully, preferring to lean on trust and “gut instinct” than sterile contracts. This plays into the myth that a legal setup spoils a friendship.
It’s smart to communicate responsibilities and expectations up front. A few things to consider when choosing a business partner:
1. Get experience with them first. The best way to test a. working relationship is to have work experience with your prospective partner.
2. Choose complimentary strengths. A business partner should help fill out your weaknesses and vice versa.
3. Look for a good track record. Do some research on your future business partner and encourage them to do the same.
4. Use a partner agreement / contract. It’s important to have an in depth conversation about roles and responsibilities prior to formalizing any relationship.
5. Don’t choose someone who you would rather just hire. Consider hiring them as a consultant later on.
*Before moving on to the planning your facility and ordering equipment: Do a quick review and reworking of your feasibility study.
Step 10: Get equipment
In this phase:
- Farming equipment
- Growing equipment
FARMING EQUIPMENT
After checking your layout with advisor, source your equipment. Here are our recommendations for hydroponics, aquaponic, and indoor farming equipment:
Plumbing: Most plumbing parts like PVC, fittings, and glues can be sourced from a local Home Depot or Lowe’s. Some of the more obscure fittings are available online.
Lighting: Lighting is a complicated equipment type to choose. The most popular types of lighting are HID, LED, and fluorescent lights. (Learn the pros and cons of each here.)
Purchase lighting from well-known sources like GE or Phillips.
HVAC: Commercial farms should consider a professionally-fitted HVAC system. Consultants like Doctor Greenhouse are well worth their fee in this regard. Click here to take the Upstart University HVAC Course.
Structure & Infrastructure: Different growing techniques and climates require different facilities. Greenhouses, indoor spaces, warehouses, and containers are the most popular facilities for modern farmers.
Learn More:
- Greenhouse Equipment
- Compare Greenhouse & Indoor Farms
- Considerations of Container Farming
- Modular Farms – Our only recommended Container Farm Manufacturer
- Considerations of a Warehouse Facility
GROWING EQUIPMENT
DWC (Deep Water Culture) – We recommend Bigelow Brook Farms for DWC-specific products. You can also hand build DWC systems, but this can be difficult on a commercial scale.
NFT (Nutrient Film Technique) – Crop King offers quality NFT supplies. NFT systems can also be built by hand, but this again becomes difficult at a commercial scale.
Media Bed – Media bed systems are easy to build from hand using lumber and parts. A convenient media bed kit that we recommend is the My Aqua Farm.
Bato buckets (or Dutch buckets) – Bato buckets can be built on a DIY level. Commercial growers are better off using a manufactured product like these buckets.
ZipGrow – ZipGrow Towers can be used in greenhouses, in warehouses (the ZipFarm), and containers.
Media – Hort Americas offers a wide variety of media for hydroponic and aquaponic growers. For help deciding which media is the best fit for your farm, go through the Choosing Your Substrate course on Upstart University.
Pesticides – Pesticide legality and effect differ by facility type, growing method, and location. For specific pesticide recommendations and information about licenses, talk to your local Extension Office.
Step 11: Start Growing & Delivering Crops
In this phase:
- Growing crops
- Delivering crops
- Managing customers
- Housekeeping & maintenance
How to use this guide:
Today’s aspiring farmers have more technology, education, and support than ever before. All farmers need now is a roadmap to starting a farm.
To use this guide as your roadmap:
- Read through the overview of each step.
- Download the checklists for each section.
- Check in with your mentors every few weeks.
Steps to starting a farm
If you’ve decided to become a part of the new food system, you’re in the right place.
This is your step-by-step guide to starting a farm. Use the checklists and resources in each section to make sure that you’re diligently planning for a profitable farm business!
Step 1: Decide to put in the work
Your journey to owning a local farm starts when you raise your hand and declare, “I’m serious about starting a farm and I’m willing to put in the work!”
It’s important to note that no matter how much technology you plan to use, farming still requires a lot of time and perserverance to be successful. There is no “easy” farming business!
Curious if farming is for you?

Today’s farmers are…
-
Self-motivated.
- Driven to reach a goal.
- Always humble enough to know there’s always more to learn.
-
Not willing to give up when things don’t go their way the first time.
Free Webinar: “How to Stop Talking And Start Farming”
Step 2: Get Connected
Community & Mentorship: No farmer starts and runs a farm entirely on their own. Getting connected to those with experience, as well as other aspiring farmers like yourself, will help you stay on track and avoid mistakes.
Here’s why you need guides and mentors along the way:
Real World Experience & Tips
Tap into the successes and failures of others to shorten your own learning curve.
Better Success Rates
Data shows that you’re more likely to succeed with a mentor.
Build Networks & Community
Mentors already have the connections that you want to have in 5 years. They often introduce you to key industry players, potential clients, and other farmers.
Assurance & Encouragement
Sometimes new farmers need encouragement to keep going; the perspective of a mentor can provide that encouragement.
To Keep You From Making Dumb (Emotional) Mistakes
Mentors can keep you accountable and have the experience to stop you from making bad decisions.
Complete Information
The practical tips and pointers of experienced mentors fill in the “information holes” present in this industry.
Finding a Mentor
Entrepreneur.com says anyone starting a business should look for at least one of three types of mentors: mentors-from-afar, industry mentors, and direct mentors.

The first type of mentor may be the people whose blogs you follow or whose books you read.
The second are people who will eventually be your compadres; fellow farmers with similar goals and experiences. Check out UpstartFarmers.com for a starting point.
The third type of mentor is the direct mentor. Direct mentors are people who are experts in the field and available for regular advising. This could be an experienced farmer, an account manager, etc.
Step 3: Set goals, draft a business plan, and start your feasibility study.
Initial Planning: It’s time to set some goals and draft your business plan! Why are you starting a farm? What do you want to achieve? Who do you want to serve? All of these questions (and more!) need to be thought about before you start building or looking for funding. Part of doing this well is having realistic expectations about what running a modern farm is like (see below!)
One of the biggest mistakes would-be entrepreneurs make is procrastinating on their business plan. Another important role of the business plan is to aid in securing funding; many banks and other lenders won’t even consider applicants that don’t have a business plan.

The business plan will include things like a market analysis, the types of products and services you plan to sell, how to plan to promote your farm and get customers, and of course your competitive advantages.
Don’t wait! Start a “living” business plan document that you can add to as you figure things out.
Need a little help? Learn how to write a business plan with the guide or through the Upstart U course.
When you’re setting your farm goals, it’s important to have realistic expectations. The farms that fail are those who approach growing and selling food thinking that it will be easy. Don’t forget: Farming is hard work!
Get real-life insight into running a modern farm through these tips:
And through commentaries by experienced industry experts like this.
Now that you have a clear direction and a “living” plan on paper to start mapping out your business, it’s time to start your feasibility study!
What is a feasibility study?
The feasibility study is the group of research and estimations that answer the question, “Can I make money with my farm?” It covers…
-
Revenue projections
-
Fixed and variable costs
-
A market survey
-
A conservative pricing strategy
-
A capital expense budget
-
A look at your energy costs
- Detailed pro forma projections covering cash flow, net income and balance statements
Don’t fear the feasibility study! This is your chance to evaluate whether your farm idea can actually make money. It will either give you positive results and the confidence to go forward, or it will give you negative results and help you avoid wasting time and money.
Feasibility studies can be done on a DIY basis or through workshops focused on indoor growing. If you’re experienced in economics or business and feel confident, then the DIY version is probably just fine for you. If you’re a newbie or uncomfortable doing it by yourself for any reason, a workshop is the way to go.
Step 4: Learn and Grow
Learn by doing: Your ability to make money as a farmer depends on your ability to grow high quality produce (and sell it, of course). Even though we’ve focused a lot so far on the business side of things, it’s critical aspiring farmers start a pilot system as early as possible to learn the in’s and out’s of soil-less growing. This is where you’ll learn all about growing healthy plants and work through some beginner system mistakes before you have any customers.
What’s the best way to learn? Combine plants and education.
Enroll in Upstart University and start a test system.
Upstart U is designed to offer farmers a comprehensive guide to starting a farm, from business planning and markets to growing and selling food. No other resource like this exists in the industry!

We highly recommend Upstart University to anyone starting a modern farm. You can get signed up here and choose your first courses.
As you learn more about different growing techniques and crop management, you’ll start to form preferences for your farm. After taking courses like these, you’ll be able to make good decisions about how to grow and what to grow:
The importance of a pilot system
To amplify and accelerate your grower’s education, start a test farm. You can take all the courses and read all the blog posts you want, but if you’re not applying what you learn, it’s not sticking like it could.
A “pilot system” is a smaller version of your future farm that allows you to test the waters, make mistakes, and start developing processes and best practices that allow you to scale seamlessly into your full production farm.
The other BIG benefit of starting a pilot system is you can use it to grow sample crops for approaching customers and proving demand. Having real produce in hand when talking to chefs and produce managers has helped many of today’s top farmers close their biggest deals. Prospective customers fall for the flavor and freshness instantly!
Step 5: Find Your Customers
(Can be done concurrently with step 6.)
Market Research & Sales Planning: If you’ve made it this far, you know that growing the crops is only half the battle when starting a modern farm. You can have the freshest, most flavorful crops in your city or town, but if you don’t have customers to buy them, you might as well close up shop. Market research is where you define profitability.
The bottom line: If you’re not selling the crops you grow, you’re gardening. And gardening is great! Just don’t expect to see any return on your investment.
By this point, you have researched the Four Markets. You know some general information about your markets from doing your feasibility study, and you have identified potential markets. This section just helps you to fill in the holes.
You’re going to complete two types of market research: General research and local research

General research consists of easy-to-find information, usually from places like the US Census. The purpose of general research is to estimate your market cap.
Local research, on the other hand, requires a more specific approach. (Learn the basic difference between the two here.)
Local market research isn’t hard, but you do have to show up and give a little hustle. The most important part of local market research is getting face-time with potential clients. This is the only way to get truly accurate local sales and pricing data. Plus, it gives you a bunch of leads to start with later down the road when you’re actually delivering produce. (REAL opportunities are more valuable than estimated opportunities!)
To get started, use this worksheet. It helps you cover all your bases and keep all the information you find in a useful format. Modern Farmer’s Guide to Local Markets (Worksheet PDF)
How to put local market research to use
The most immediate thing that market research allows you to do is find an entry point.
Your entry point into the market is your starting point; your initial operation and offering before scaling. For instance, Chris Lukenbill at Fresh With Edge used a Live Sales Model at farmers’ markets as his entry point. From there, he scaled into restaurant sales, food co-op sales, and direct sales. (This sales growth was balanced with farm growth as well; he built a new greenhouse before scaling.)
A key part of your entry point will be deciding on a sales model. Simply put, a sales model is the set of processes and tools that you use to get produce from your farm into the hands of the consumer. Live Sales is a popular model for ZipGrow farmers like Lukenbill. Others use various forms of packaging and delivery in their sales models.

Once you’ve chosen your entry point and sales model, you’ll look forward a little bit. Although financial planning is the next section, you might be working on financial planning and marketing concurrently. Since marketing is coming up, it’s time to start thinking about your value propositions!
Review your sales model, target markets, and everything you’ve learned about your growing technique and crops so far. As you do that, you’ll notice certain strengths and values that give you an advantage over the other producers active in your market.
These strengths are your value propositions- the reason that people buy your produce over others. You’re going to want to play them up in your marketing.
Why do this now rather than in the marketing section?
It might seem like we’re jumping the gun on value propositions, but there’s a reason to start defining value props as soon as you have markets in mind: it allows you to start getting active in your markets right away.
This means that when you launch your farm, you’ll already have a list of clients prepared. Use your value props as soon as you know them.
(And don’t be afraid to bring them to potential clients in a real way… aka samples!)
Step 6: Estimate Funding and Debt
(Can be done concurrently with step 5.)
Financial Planning Part 1: The first financial planning phase includes funding and debt research.
If you don’t have much experience with funding, you may feel like you are shooting in the dark. When a bank lender asks you, “What are your pro forma revenue projections?”, your answer might be, “I have no idea.”
Don’t worry; we’re here to help. Before you start searching and applying for funding, however, take these three steps:
![]() Know your goals and starting size
Know your goals and starting size
![]() Demonstrate how much demand there is for your crops
Demonstrate how much demand there is for your crops
![]() Get your financial house in order
Get your financial house in order

When you’re ready to start looking at funding, you have several options:
- Loans
- Private investment/venture capital
- Equipment leasing
- Crowdfunding
- Grants
Learn the basics of each option (pros and cons, special considerations, payback strategies & timelines, and how to get started in The 20 Minute Guide to Financing Your Farm.
After carefully considering funding options, it is time to apply for funding. Learn more:
Based on the funding you get, create a real-life timeline!
A key part of the funding decision is debt. Debt is an inevitable result of lending and the baggage of many types of funding. That being said, many farmers have started farms without debt (or with very low debt). “Bootstrapping” is a more difficult goal for farmers, but definitely achievable with today’s resources.

Either way, farm owners must be comfortable with the level of debt that they are pursuing before starting their farm! To make the best debt decisions for your farm, you need to understand the types and factors of debt.
There are eight types of debt that new farmers might incur:
1. Secured
2. Unsecured
3. Fixed interest rate
4. Variable interest rate
5. Fixed payment term
6. Variable repayment period
7. Deductible
8. Non-deductible
Psst… Make sure you and your debt are treated lawfully. The Fair Debt Collection Practices Act protects people like you from unfair or deceptive treatment. Get a summary here.
Step 7: Plan Your Facility
Choose the right facility. Modern farmers are using all types of facilities, from greenhouses and warehouses to basements and backyards. Different types of equipment and production methods work differently in different facilities. Your production methods will dictate to a significant extent which type of facility you use.
Here are the common trends we see:
DWC (Deep water culture) systems are typically run in greenhouses in tropical areas. The high labor requirements and large footprint of the technique are best suited to places where labor is cheap and space isn’t too cramped.
NFT (Nutrient film technique) systems are run either in greenhouses or in stacked systems in greenhouses or warehouses. The first facility is best suited to this technique.
ZipGrow Towers are used in greenhouses, backyards, and homes. Since they are so modular (each Tower is separate), they can fit into almost any space in any quantity.
ZipFarms are ZipGrow-based systems specially designed for warehouse use. They consist of ZipGrow Towers on a rolling rack with a light rack overhead; they are pre-configured but set-up can still vary by quantity and orientation.
Media beds are best for outdoor or greenhouse facilities. Media beds tend to be heavy with high thermal mass and a large footprint. Media bed growers don’t move their equipment, and stacking is out of the question. That makes them a good fit for places that aren’t tight on space.
Bato buckets are primarily used in greenhouses, with some indoor facilities. Most hydroponic tomato systems are bato systems (or “bag systems” which function similarly). Most of these systems are in greenhouses.
If you aren’t sure which grow method is right for you, take the Upstart University Course “Choosing Your Production Method”.
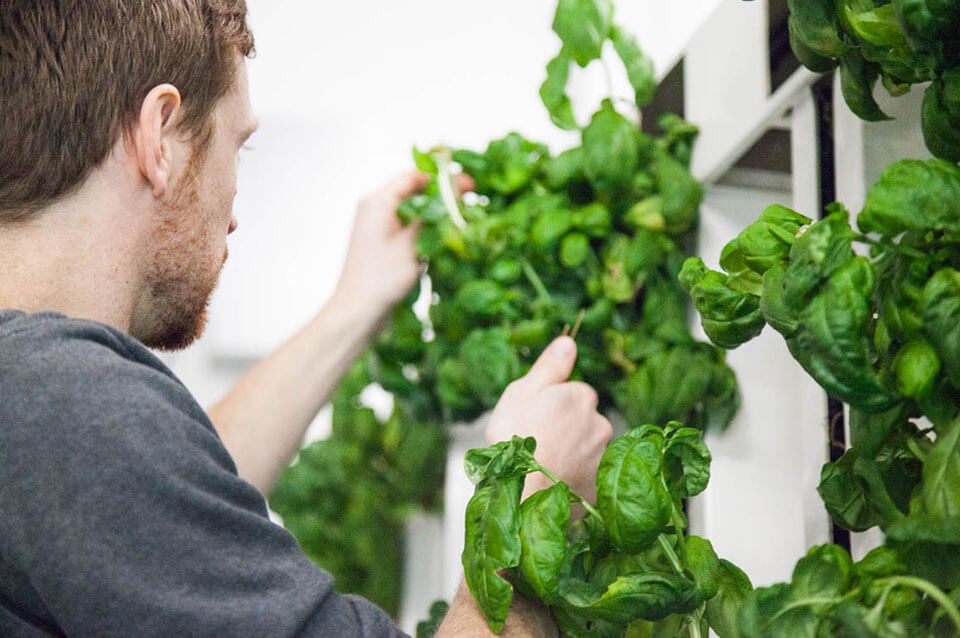
Modifications to the facility will have to be made on a case-by-case basis but could include:
- Insulating
- Sealing
- Electrical additions
- Chiller installations
Of course, some facility characteristics need to be in place before purchasing. These are usually infrastructure traits that can’t be changed. For example, four necessary attributes are:
- Adequate ceiling height
- Minimum dimensions
- Exit access
- Wall protrusions
(Learn more about those four attributes here.)
The best way to determine the modifications that you will need is to know your equipment well. Equipment manufacturers can get you information on dimensions, set-up, and configuration.
Step 8: Implement Sales & Marketing Plan
Are you set on financials? Comfortable with the level of debt you’re taking on and confident of the projections you’ve made? If yes, then it’s time to start marketing and planning sales.
The main tasks are:
1) Creating a brand
2) Creating action plans for your markets
3) Getting payment plans ready
Branding includes core language like a farm name, values, and mission statement language, as well as the design of your packaging, web site, social media, etc. In all, the farm branding is the way that your farm presents itself to the world.
Farm Brand is Important!

Your brand is the real estate upon which you build your reputation. This is where people judge your farm, your farm’s values, and of course, your farm’s produce.
The difference between poor branding and good branding can often be the difference between good market cap and low market cap, high-quality leads and poor-quality leads, etc.
Bright Agrotech offers help on small farm branding, complete with templates and custom help on:
![]() Packaging
Packaging
![]() UPC Barcode Creation
UPC Barcode Creation
![]() Business Cards
Business Cards
![]() Letterhead
Letterhead
![]() Logos
Logos
![]() Website design
Website design
For other farmers, a whole suite of marketing help exists through Upstart University resources:
Social media: SHOW UP and start documenting!
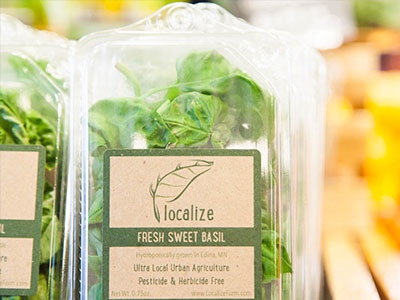

Before you create a branding strategy:
- Know your packaging needs
- Take the Upstart U Law 3- Intro to Food Labeling and Weighing
Market action plan – the nitty gritty of selling
The second part of planning marketing is creating the action plans to get your sales models off the ground and working for you!
The action plan you craft will depend on the market you’re using as an entry point. Check out the resources below to learn about starting a CSA (community supported agriculture group), selling to restaurants and grocery stores, and other sales models.
Resources on choosing markets:

Collecting payment
So you know how to grow and sell. But how will you accept payment for your produce? Have payment methods ready and accounting practices in place to keep your farm accounts organized and easy to assess.
1. Set up bank accounts for your farm business
Set up a separate bank account for your business. This is one indicator to the IRS that your farm is an actual business, which will make taxes and audits much smoother down the road.
2. Set up payment tools like Square and Quickbooks
Some farmers use plain old cash and checks to receive payment from customers, but in some situations it’s good to have other options. For example, many market goers only carry a card for payment. By limiting payment to cash or check, you may be missing out on significant business!
In addition to accessible payment, many payment tools like Quickbooks are combined with other account management tools that can make accounting much easier.
Your accountant may have recommendations and preferences for payment systems! Be sure to consider their preferences, since they will often be the main person using the system.
Step 9: Organize Business Operations
Operations, management, and administration are the machinery of your business. Understanding your machinery will involve a lot of research and paperwork, so get ready! It can be helpful to bring in other people to business operations if you’re uncomfortable doing it yourself. During this phase of business planning, you will research and plan:
![]() Your business structure
Your business structure
![]() Insurance needs
Insurance needs
![]() Employment & Taxes
Employment & Taxes
![]() Zoning requirements
Zoning requirements
![]() Certification processes
Certification processes
![]() How to choose a good business partner
How to choose a good business partner
Know your business structure
Choosing a business structure helps you determine who’s accountable for each component of your business’s operation. It also helps to give investors and banks a clear picture of who you are and who’s leading the team.
The three most common types of businesses for small farmers are sole proprietorships, partnerships, and corporations.


1. Sole Proprietorship
A business organized as a sole proprietorship is owned by a single individual or family and is not organized as a corporation. This is common, especially in agriculture, and it gives the owner of the business a ton of control/responsibility. For example:
- All profits, losses, and liabilities are vested in the proprietor (which can be either a good or a bad thing).
- Lenders base decisions about the business based on the assets and credit history of the proprietor.
- Business affairs can be kept confidential.
- Proprietors have complete discretion when it comes to selling the business.
Running your business as a sole proprietorship has its disadvantages, too, because:
- Proprietors must pay personal business taxes.
- Proprietorships may suffer from limited capital funds available to the business.
- Highly trained employees are limited in their opportunities to rise to the top.
- The business is dependent on one person; they lack stability and continuity.


2. Partnership
A partnership is owned by two or more people. We recommend having a written partnership agreement so that each partner knows what their responsibilities are. Oral partnership agreements are legally valid, but they are more difficult to defend in the face of a dispute.
Advantages of a partnership include:
- They are as easy to set up as a proprietorship, and they have low setup costs.
- Taxes are paid by individuals on their share of the profits.
- Partners may sell their interest in the company as long as the other partners agree.
- There are many different partnership levels and types, including senior partners, junior partners, silent partners, and many more.
A few disadvantages of a partnership include:
- General partners face unlimited liability.
- A limited number of partners may be added or feasible.
- Partnerships may lack continuity and stability for same reasons as sole proprietorship.
- There are some tax disadvantages.


3. Corporation
A corporation provides owners with protection from losing more than what they invested if the business fails. It is a special legal entity endowed by law with the powers, rights and liabilities of a person.
There are some obvious advantages of being incorporated:
- Owners are not personally liable for debts.
- Transferring ownership is easy.
- It is perpetual, meaning that it doesn’t have some the continuity issues of sole proprietorship and partnerships.
- It’s easier to raise capital.
A few disadvantages associated with corporations are:
- Corporations face double tax liability (though there are some exceptions to this).
- They face more regulations.
- There is a lack of privacy.
- Owners may not control management or policies.
It is important to note that there are other ownership forms out there. They are less common or derivatives of these three forms. For example, there are also limited partnerships and S-corps. Before officially declaring and filing for your form of ownership, we recommend that you consult with a lawyer. This page does not constitute legal advice.
(This is an Upstart University summary from the Business Planning Course. To learn more like this, register for a free week of courses.)
Insurance
Insuring your Upstart Farm is an important step when starting the business.
Even if you’re selling solely to markets that don’t require proof of insurance, you still need to cover your farm’s liability. Selling to a market that didn’t require proof of insurance doesn’t mean that you can’t be sued.

“It’s a wise business decision,” Dr. Nate emphasizes. “It’s just good business practice to have insurance on what you’re doing. It’s being responsible to your business, your employees, and your consumers. Farmers need to be prepared to fix problems.”
Upstart Farms should carry a general liability or umbrella policy on their farm.
You want to have insurance that protects:
- The product liability of your produce and food items
- Your farm assets
Product liability insurance protects your farm if, for example, someone gets sick from eating your food.
Just like you protect your home and personal assets with homeowners insurance, you want to do the same with your farm assets. In the event of natural disaster, theft, or similar adverse events, make sure your greenhouse, other structures, equipment, and any associated loss of farm income are covered.
Additionally, your may need other kinds of insurance, like auto insurance for farm vehicles (think about what car/truck you use to transport your towers live to market).
OUR TIPS

1. Use an insurance broker.
When searching for insurance for your farm, it helps to use an insurance broker. A broker will go out and get quotes from dozens of insurers, coming back to you with the best policy.
Your insurance broker should obtain at least 3 to 6 quotes for you, but you’ll want to get as many as possible. Make your broker work for you!
2. Get plenty of coverage!
The amount of coverage that you obtain depends entirely on your farm. At the bare minimum (and seriously – this is the absolute minimum), a farm will want at least $50,000 of insurance coverage.
Consider what kind of business your farm is doing. If you expect to do $200,000 in sales this year, have your insurance cover $200,000 to $400,000. Your broker and agent may be able to offer a specific recommendation for your farm – use their advice!
Employment & Taxes
There are several things you need to do with your farm before hiring. It’s not a bad idea to research these, even if you don’t plan on hiring right away!
*We are not a substitute for a certified accountant! This is just a supplementary overview of some of the employment and tax tasks you’ll be facing as a farmer. Please hire an accountant to make sure you’re following regulation and laws for your state.
Business
1. Register your business
The easiest way to do this is to go to the state government website and follow their instructions for registering your business! There may be a small fee (in Wyoming it’s $100, for example), and it will take a few weeks for the registration to go through.
2. Get your employee identification number (EIN).
This is necessary to file taxes, but free and easy to get.
3. Get workman’s compensation and unemployment insurance set up.
4. Register to file taxes.
If you have questions, talk to your state office. You can start at eftps.gov.
5. Research labor laws.
These will be state specific. Start with your state’s Department of Labor website.
Hiring & HR
When you get new employees:
1. Fill out a W4
This allows you to deduct taxes from paychecks.
2. Fill out an I9
This makes sure that they have the correct identification paperwork.
3. Safety training
If you have questions, talk to your state office. You can start at eftps.gov.
Other:
Non-disclosure agreements
Sexual harassment training
Fire & evacuation training
*HR platforms can be helpful for keeping information straight and creating a professional processes. A few examples are Zenefits and Greenhouse Software. There are several free programs.
Payroll & Taxes
You can pay employees whenever works well for you and your bank, as long as it adheres to your State’s / the Federal Minimum Wage,
Payroll systems are highly recommended. Some examples are Quickbooks, Paychex, ADP, and (only accessible in some states) Zenefits.
You’ll pay taxes when you do payroll. In addition, you’ll have to submit a 9-41 form quarterly, and 9-40 and W-2 forms at the end of the year to the IRS.
Certain states also apply a state income tax.
HIRING AN ACCOUNTANT
A certified accountant can help you keep your finances and legal obligations orderly. They will be able to coordinate tax forms and make sure that you don’t miss deadlines, payroll, and other tasks!
Before hiring an accountant, do your research! Read reviews on accountants in your area and be sure to talk to them before hiring. Make sure that:
- They are familiar with your business and sales models
- Their rates are within your budget
- They are experienced with the specific services you need
Certification & compliance
Many markets require official certifications for you to access. Even if your market doesn’t require it, it is important to understand HAACP, sanitation procedures, GAP compliance, and Food Defense.
These certifications indicate that your farm is up-to-standard in areas of safety and sanitation across your farm:
- worker health and hygiene
- water and sewer quality
- air quality
- pest control and wild/domestic animals
- nutrient systems
- state and federal traceability
- harvesting sanitation
- processing
- storage and transportation
Where to start:
ZONING
A huge part of choosing a site is zoning. Before you can begin growing crops on a site, you have to make sure that it complies with all city and/or county regulations. These regulations are put in place to avoid public or private nuisances to surrounding communities.
Zoning, a land-use planning system used by cities and counties, plays an important role in siting a farm. Urban farmers want to grow in a zone with favorable regulations and which doesn’t eliminate any of their farm processes.
There are five basic zones:
- Industrial
- Commercial
- Agricultural
- Residential
- In-field development zone (can be used for all kinds of purposes)

The differences between these zones define where you’re allowed to grow your produce, where you’re allowed to sell your produce, composting, structure types, size limits, business and building permits, and even things like fences and parking.
The best first step is looking up the zoning regulations for urban farms or for a specific zone in your area. Most cities list their zoning maps and laws online.
Learn more about how an urban farmer can navigate zoning regulations.
PARTNER CONTRACTS
Common mistakes and issues
Almost everyone can agree that the business partner relationship is an important one. Your business partner will be a critical part of the business equation, and can either be a very strong point or a very weak point in the business structure.
Bad business partner choices have resulted in – at best- a road block and cause of delays in business development. At worst, a bad partner relationship can ruin a business. Often, this is a loss of both a business and a friendship!

Despite the relationship being important, many new business owners don’t plan the partnership very carefully, preferring to lean on trust and “gut instinct” than sterile contracts. This plays into the myth that a legal setup spoils a friendship.
It’s smart to communicate responsibilities and expectations up front. Elesif McDonald has worked with hundreds of new farmers and seen both the benefits and the challenges of partnership relationships.
Elesif and other experts agree on these tips for choosing a business partner:
1. Get experience with them first
You might know your business partner, but do you know how to work with them? The best way to test a working relationship is to have work experience with your prospective partner. Do you work well together? Do you communicate well? Do you agree on task standards?
2. Choose complementary strengths
Having the same vision is good. Having identical strengths is not. A business partner should help fill out your weaknesses and vice versa. If neither of you are good at a particular part of the business, consider hiring to fill that gap. If there are many holes in your combined competence, you might not be a good partner match.
3. Look for a good track record
Do some research on your future business partner and encourage them to do the same. If your business partner has a history of giving up or investing badly, you might need to reconsider the partnership. This could be an awkward phase, but exchanging resumes can not only help you spot red flags but will help you understand each other’s strengths. Maybe you see that your business partner has written grants before. Now you can use that skill if you ever need it.
4. Use a partner agreement/contract
“Going into business with a partner has a lot of benefits. It’s important to have an in depth conversation about roles and responsibilities prior to formalizing any relationship. Who is in charge of sales? Who is managing the system on a day to day basis? What if someone wants out in 3 months? What performance metrics will guide each of you and your roles? Getting the hard conversations out of the way in the beginning can save a lot of stress, time, and money down the road if things don’t work out as planned.”
5. Don’t choose someone who you would rather just hire
“Don’t partner with someone just because you can’t afford to hire them. It is better to hire them as a consultant than to give away a part of your company or to find out later that he/she is not a good partner for you.” –PAMELA WASLEY, CEO at Cerius Executives, on Entrepreneur
*Before moving on to the planning your facility and ordering equipment:
Do a quick review and reworking of your feasibility study. Are your estimations on track so far? Do you need to adjust any numbers with new information to get accurate projections? Make sure that you aren’t going to encounter any curve balls from old numbers!
As you update your feasibility study, do the same for your business plan. Since your business plan will act as the compass for your farm in future situations, you want it to be as true as possible.
Step 10: Get equipment
After checking your layout with advisor, source your equipment. Here are our recommendations for hydroponics, aquaponic, and indoor farming equipment:
Plumbing: Most plumbing parts like PVC, fittings, and glues can be sourced from a local Home Depot or Lowe’s. Some of the more obscure fittings are available online.
Lighting: Lighting is a complicated equipment type to choose. The most popular types of lighting are HID, LED, and fluorescent lights. (Learn the pros and cons of each here.) Purchase lighting from well-known sources like GE or Phillips.
HVAC: Commercial farms should consider a professionally-fitted HVAC system. HVAC is a crucial element of growing. Consultants like Doctor Greenhouse are well worth their fee in this regard. Click here to take the Upstart University HVAC Course.
Structure & infrastructure: Different growing techniques and climates require different facilities. Greenhouses, indoor spaces, warehouses, and containers are the most popular facilities for modern farmers.
>> Learn more about greenhouse equipment here or compare greenhouse and indoor farms here.
>> Learn more about the considerations of container farming here. (Our only recommended container farm manufacturer is Modular Farms.)
> Learn about the considerations for a warehouse facility here.
Growing equipment: DWC (Deep Water Culture) – We recommend Bigelow Brook Farms for DWC-specific products. You can also hand build DWC systems, but this can be difficult on a commercial scale.
NFT (Nutrient Film Technique) – Crop King offers quality NFT supplies. NFT systems can also be built by hand, but this again becomes difficult at a commercial scale.
Media Bed – Media bed systems are easy to build from hand using lumber and parts. A convenient media bed kit that we recommend is the My Aqua Farm.
Bato buckets (or Dutch buckets) – Bato buckets can be built on a DIY level. Commercial growers are better off using a manufactured product like these buckets.
ZipGrow – ZipGrow Towers can be used in greenhouses, in warehouses (the ZipFarm), and containers.
Media – Hort Americas offers a wide variety of media for hydroponic and aquaponic growers. For help deciding which media is the best fit for your farm, go through the Choosing Your Substrate course on Upstart University.
Pesticides – Pesticide legality and effect differ by facility type, growing method, and location. For specific pesticide recommendations and information about licenses, talk to your local Extension Office.
Step 11: Start Growing & Delivering Crops
Your farm and business are both ready to go, and you can finally start operating! This means:
- Growing crops
- Delivering crops
- Managing customers
- Housekeeping & maintenance
